How to Replace Garage Door Trim Without Disturbing the Door
To replace the trim around a garage door, first confirm that the damaged pieces are only the exterior decorative surround. Measure their profile, remove them without disturbing the door hardware, check the exposed backing for moisture damage, and fit exterior-rated replacement trim using its manufacturer’s fastening, joint and finishing instructions. Stop if the damage reaches the jamb, structural header or wood carrying door brackets.
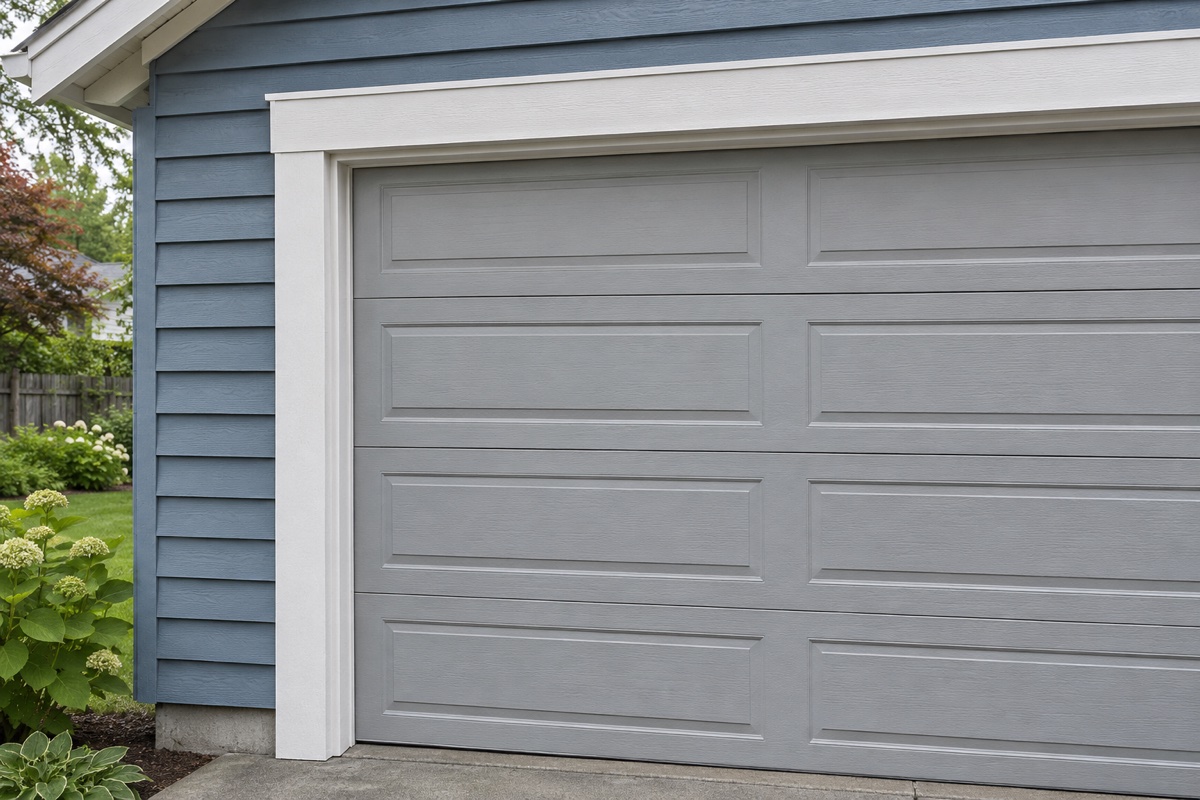
A neat-looking replacement will fail again if water is still getting behind it. This guide covers cosmetic casing on the outside face of the wall, not framing repair, track adjustment or replacement of the flexible weatherseal.
 Open full diagram
Identify the part before removing it
People use “garage door trim” for several different parts. Trace the damaged piece from a safe position with the door fully closed. Its location alone does not prove that it is decorative.
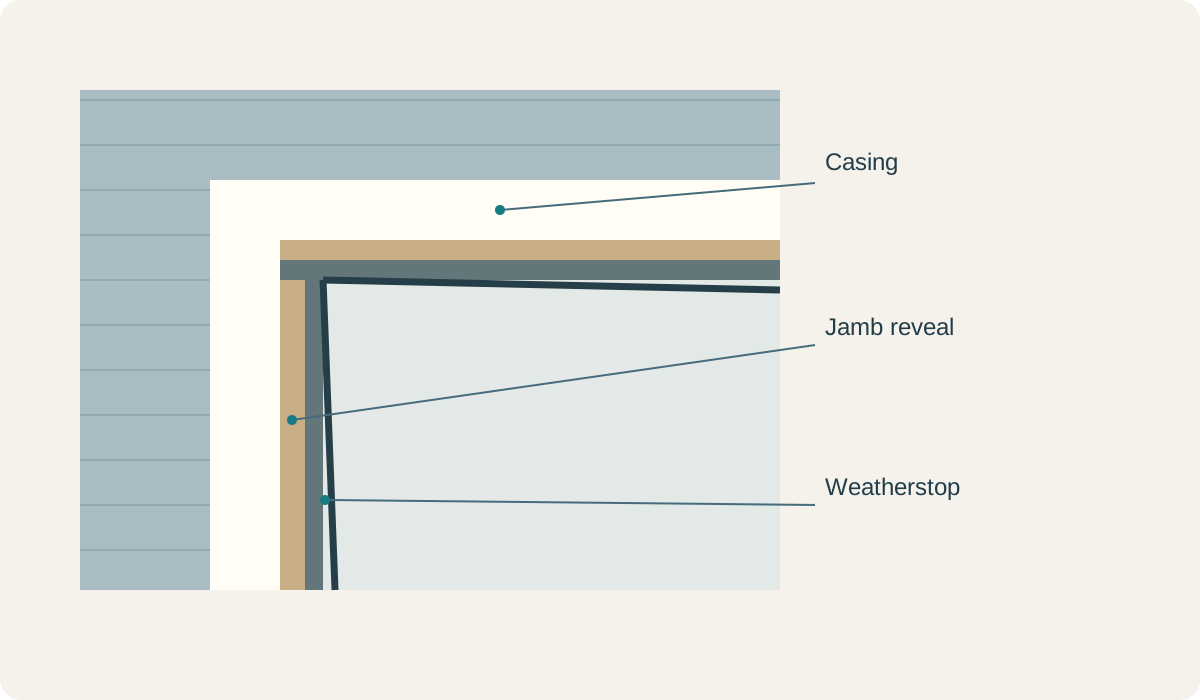
- Cosmetic casing or surround: the finish boards or molding framing the opening on the exterior wall. They cover and finish the transition between the wall cladding and the opening.
- Weatherstop or perimeter seal: a narrow stop with a flexible lip that touches the closed door. Some products combine a rigid trim profile and a seal, so the two jobs may overlap.
- Jamb and structural header: the sides and load-carrying construction above the opening. A decorative board across the top is not the structural header behind it.
- Door mounting surfaces: wood or other approved backing carrying track, spring or opener brackets. Do not remove, cut or loosen these surfaces or their fasteners.
If a bracket attaches to the piece you intend to remove, or you cannot tell what it supports, have a garage-door professional and, where needed, a carpenter identify the assembly first. A trim project should never require loosening a cable, spring, bottom bracket or track attachment.
 Open full diagram
Check for conditions that change the job
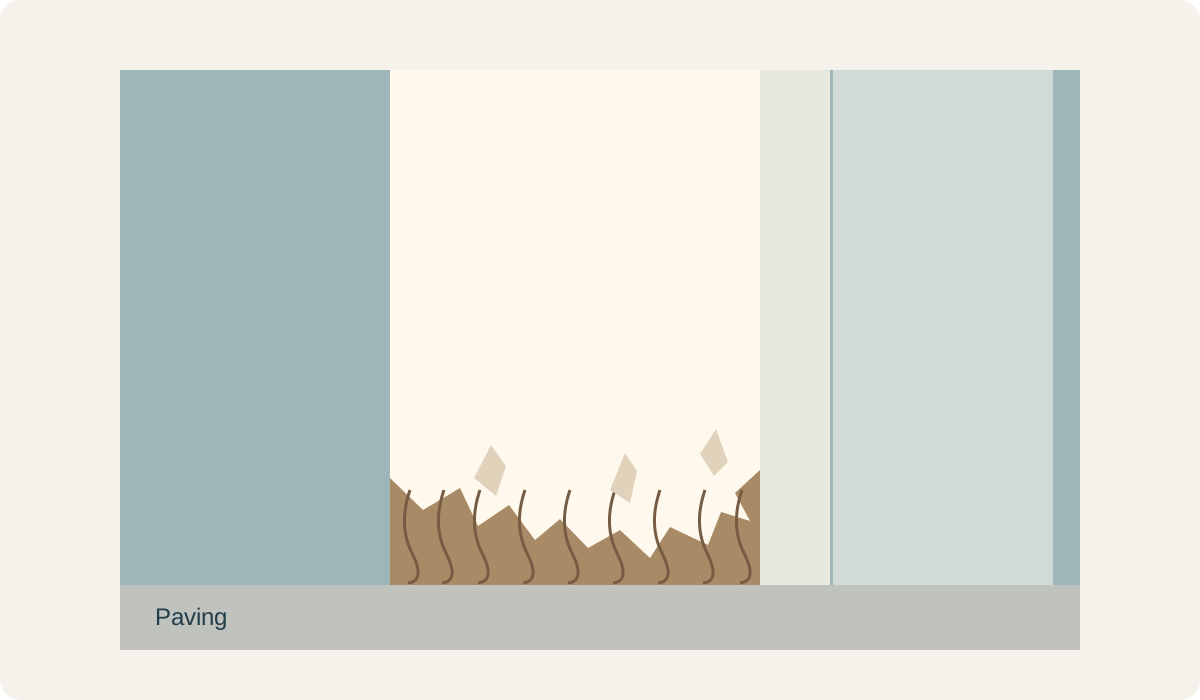
Look for repeated staining below the top corners, open joints, peeling paint at board ends, swollen edges and a crumbling lower end. These observations help locate the problem, but they do not establish how far decay extends behind the finish.
- Paint of uncertain age: before cutting, sanding or prying painted material, address possible lead. In the United States, homes built before 1978 may contain lead-based paint. EPA recommends a lead-safe certified contractor for renovation in these homes; unknown building age also calls for lead-safe precautions.
- Water behind the trim: wet backing, damaged flashing, insect damage or decay extending into the wall requires investigation before covering it.
- Door or structure symptoms: loose mounting brackets, a visibly distorted opening, a sagging top or a door that binds calls for professional assessment, not a cosmetic patch.
- Cladding trapped around the trim: brick returns, stucco, metal wrapping or integrated siding channels can make removal a building-envelope repair rather than a simple board swap.
Do not bury rotten wood under a wider board or a PVC cap. A rot-resistant face does not restore the support behind it.
 Open full diagram
Measure the existing detail, not just the door
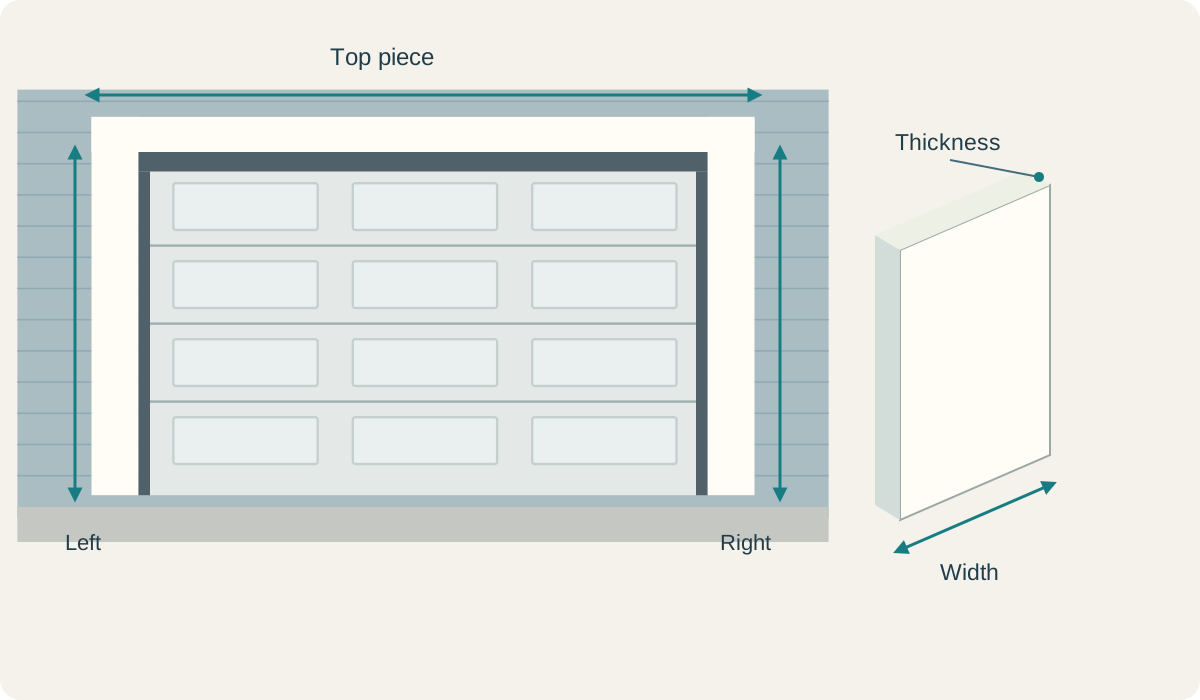
Photograph both lower ends, both top corners and the relationship between siding, casing and weatherstop. Measure each side separately: opening height does not necessarily equal trim length, and a nominal door size is not a cut list.
- Record the finished length of the left board, right board and top board, plus their actual width and thickness.
- Record the corner arrangement: square butt joints, mitered ends or a shaped molding profile. For miters, distinguish the long-point and short-point dimensions.
- Note the reveal, meaning the exposed strip of jamb between the casing edge and the opening or weatherstop.
- Check the available bearing surface and where the existing siding terminates. A thicker replacement can change these relationships.
- Identify the required clearance above paving, soil or another wet surface from the selected product and wall-system instructions.
Keep a sound offcut of the old profile as a matching sample once safe removal is possible. Buy stock lengths that accommodate the actual cuts and joints; avoid adding a splice merely because a standard board is slightly too short.
 Open full diagram
Choose a replacement as a complete trim system
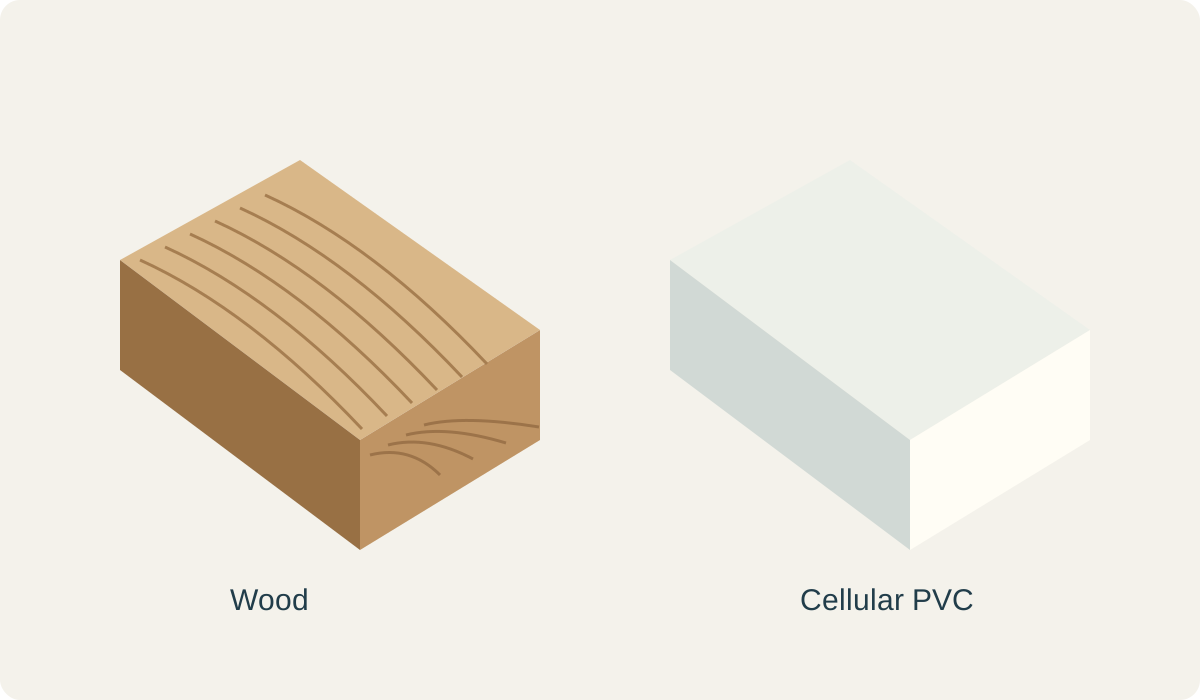
Exterior wood is useful when you need to match an existing profile or natural finish. Select a suitable exterior product and its compatible coating. Real Cedar’s trim guidance specifically calls for primer or stain on end cuts. Prepare newly cut ends before they become inaccessible at joints.
Cellular PVC avoids wood decay in the board itself, but still needs sound backing and product-specific installation. Temperature movement, fastening, joint adhesive and approved paint colors matter. Do not copy a wood nailing schedule onto PVC or assume every white PVC product may remain unpainted.
For example, AZEK’s current guide treats Premium Trim and PaintPro differently: PaintPro requires painting. Use the exact product guide for paint and movement requirements. Its garage-door Thermostop instructions are also separate from its general trimboard instructions.
For a metal-wrapped surround or a composite product, follow that system’s own details. Ask the supplier for the installation guide before buying fasteners, sealant, adhesive or paint. Check compatibility between all of them, rather than choosing materials only by color.
 Open full diagram
Prepare a controlled work area
Close the door normally and keep it closed throughout trim removal and fitting. Prevent operation using the opener manufacturer’s power-isolation procedure, including any battery backup, and tell everyone not to use remotes, wall controls or app commands. Do not pull the emergency release or alter door hardware for this job. If the door cannot close normally, have that problem repaired first.
Gather a tape measure, square, pencil, suitable hand tools, a protective block for careful prying, and the cutting and fastening equipment specified for the trim. Use eye protection, appropriate dust controls and stable access equipment. Work on a supported bench when cutting; never use the closed door as a cutting backstop. Overhead boards need controlled support and may require a second person.
Replace only confirmed cosmetic pieces
- Separate the finish joints. After coating hazards have been addressed, carefully release the paint or sealant bridging the trim edges. Avoid cutting into flashing, siding membranes, weatherstop or the door.
- Release the trim gradually. Work near its own fasteners and protect adjacent finishes with a broad block. Support the board as it comes free. If the wall or jamb moves with it, stop rather than applying more force.
- Inspect the exposed area. Remove loose trim debris and inspect the backing and water-management detail. Do not install over damp, soft or unsupported areas. Arrange appropriate repair if the problem extends beyond the cosmetic board.
- Cut and dry-fit the replacement. Match the intended reveal and corner detail. Prepare wood cut ends with the specified finish. Allow PVC movement and form its joints according to that product’s guide; there is no single gap that suits every material and temperature.
- Fasten to verified, sound backing. Follow the specified fastener material, length, edge distances and pattern. Confirm the path is clear of hidden wiring and door hardware. Adhesive alone is not a substitute for a specified mechanical connection.
- Finish the designated joints. Use the compatible filler, adhesive, sealant and coating where the assembly calls for them. Keep moving door surfaces and flexible seals free of paint, glue and sealant.
If removing the cosmetic trim also releases a combined weatherstop, pause and use the exact seal installation instructions. Do not guess at seal pressure or move the tracks to make the new surround fit.
Preserve the route that lets water out
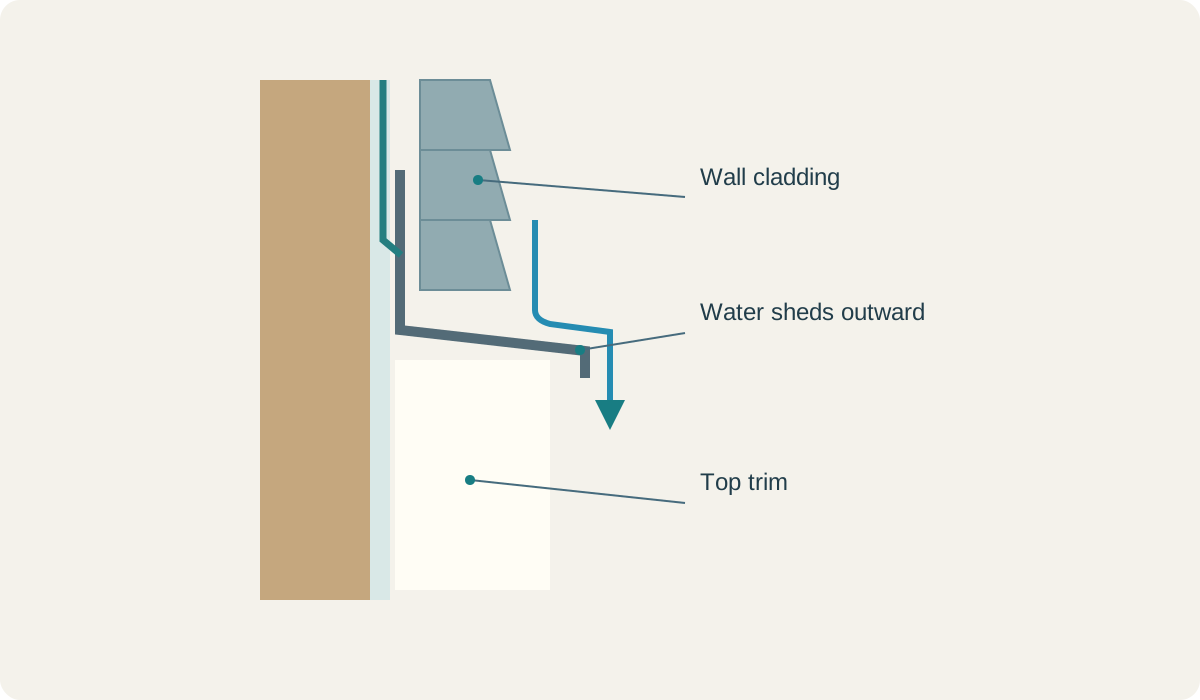
The top of the opening needs a functioning water-management detail appropriate to the wall. New caulk on the front cannot repair missing or wrongly integrated flashing behind it. Have a qualified exterior carpenter or siding contractor correct concealed water entry before fitting new trim.
Keep any designed drainage openings and flashing outlets clear. Do not caulk every visible gap indiscriminately. At the bottom, maintain the specified separation from wet surfaces and redirect avoidable irrigation splash. Do not shorten structural jambs or remove masonry to create a trim clearance.
 Open full diagram
Check the result before returning the door to service
Confirm the boards sit securely without bowing, the reveal is consistent, the corners are finished and no fastener protrudes toward the door. Remove tools and debris. Allow adhesives, sealants and coatings to cure as their manufacturers require.
Restore power only after the work area is clear. From a safe position, observe a normal complete door cycle. If there is new rubbing, binding or a displaced seal, stop using the door until the cause is corrected. Do not increase opener force or adjust travel to overcome a trim interference.
After the next rain, inspect for new staining or water collecting at the lower ends. Save the product name and finish information so later maintenance uses compatible materials.
Common questions
Can I replace garage door trim with PVC?
Yes, if the product is suitable for the exterior detail and the backing is sound. Follow that PVC product’s fastening, movement, joint and paint instructions. PVC trim cannot replace structural wood.
Is garage door trim the same as weatherstripping?
Not always. Cosmetic casing finishes the wall around the opening; weatherstop has a flexible lip that touches the door. Some products combine both, so identify the exact assembly before removal.
Can I cover rotted trim instead of removing it?
Do not cover decay and assume the problem is solved. Find the water source and determine whether damage reaches the backing, jamb or structural framing before choosing a repair.
Should every gap around the trim be caulked?
No. Seal the joints specified by the wall and trim systems, while preserving designed drainage and flashing outlets. Caulk on the surface cannot replace missing flashing.
AZEK Trim & Moulding Installation Guide: trim fastening, movement, finishing, non-load-bearing limits and separate Thermostop detail.
Real Cedar: Installing Trim Boards: wood trim joints and treatment of end cuts.
EPA: Lead-Safe Renovations for DIYers: old-paint precautions before renovation.
Related Posts
 DIY Guide
How to Install Garage Door Weatherstripping Along the Sides and Top
Replace compatible perimeter weatherstripping while preserving door movement, safe clearance and sensor visibility.
 Problem Solver
How to Seal Garage Door Gaps: Find the Cause Before Buying a Seal
Locate garage door gaps and distinguish worn weatherstripping from floor, drainage or door-alignment problems.
Sources
Manufacturer instructions and references for this guide. Match the document to your exact product.
- AZEK Trim & Moulding Installation Guideassets.azekexteriors.com
- Real Cedar: Installing Trim Boardswww.realcedar.com
- EPA: Lead-Safe Renovations for DIYerswww.epa.gov