How to Insulate a Garage Door Without Ignoring Added Weight
Quick answer
Use only an insulation system approved for your door's construction, and plan for the added weight and balance assessment before installation. Keep insulation out of hinges, section joints, tracks, locks and safety devices. Any spring adjustment or rebalancing belongs to a trained garage door technician.
We recommend deciding whether the existing door is a suitable candidate before measuring foam. A kit that physically fits between panels is not automatically compatible with the door's operating system, warranty or local fire requirements.
Do not compensate with power: A stronger opener or increased force is not a substitute for a properly balanced door. Do not run the opener to “see if it can handle” an unassessed weight change.
Prerequisites: the four checks
First, identify the door model and construction. Many retrofit kits target certain uninsulated metal sectional doors; they are not a universal treatment for wood, glass, rolling or already insulated doors.
Second, obtain the kit's total installed weight, including retainers and other added materials. Arrange for a technician to assess the existing door and the proposed change, then verify balance and operation after installation. Knauf's kit instructions flag that installation may require tuning; that is not a homeowner spring-adjustment invitation.
Third, confirm clearances and retention. Fourth, check the product's fire-protection and local-use requirements. Cellofoam specifically directs users to applicable codes and warns that its foam product is combustible.
Tools and time
The approved kit may call for a tape measure, straightedge, marker, cutting tool, protective eyewear and material-specific gloves or other protection. Use its actual list. Prepare a stable cutting surface away from the door and children.
Allow several hours for measuring and fitting an ordinary compatible kit, plus adhesive cure time if applicable and the scheduled balance assessment. The kit instructions and number of cavities determine the workload; do not plan to use the door halfway through installation.
Step-by-step project workflow
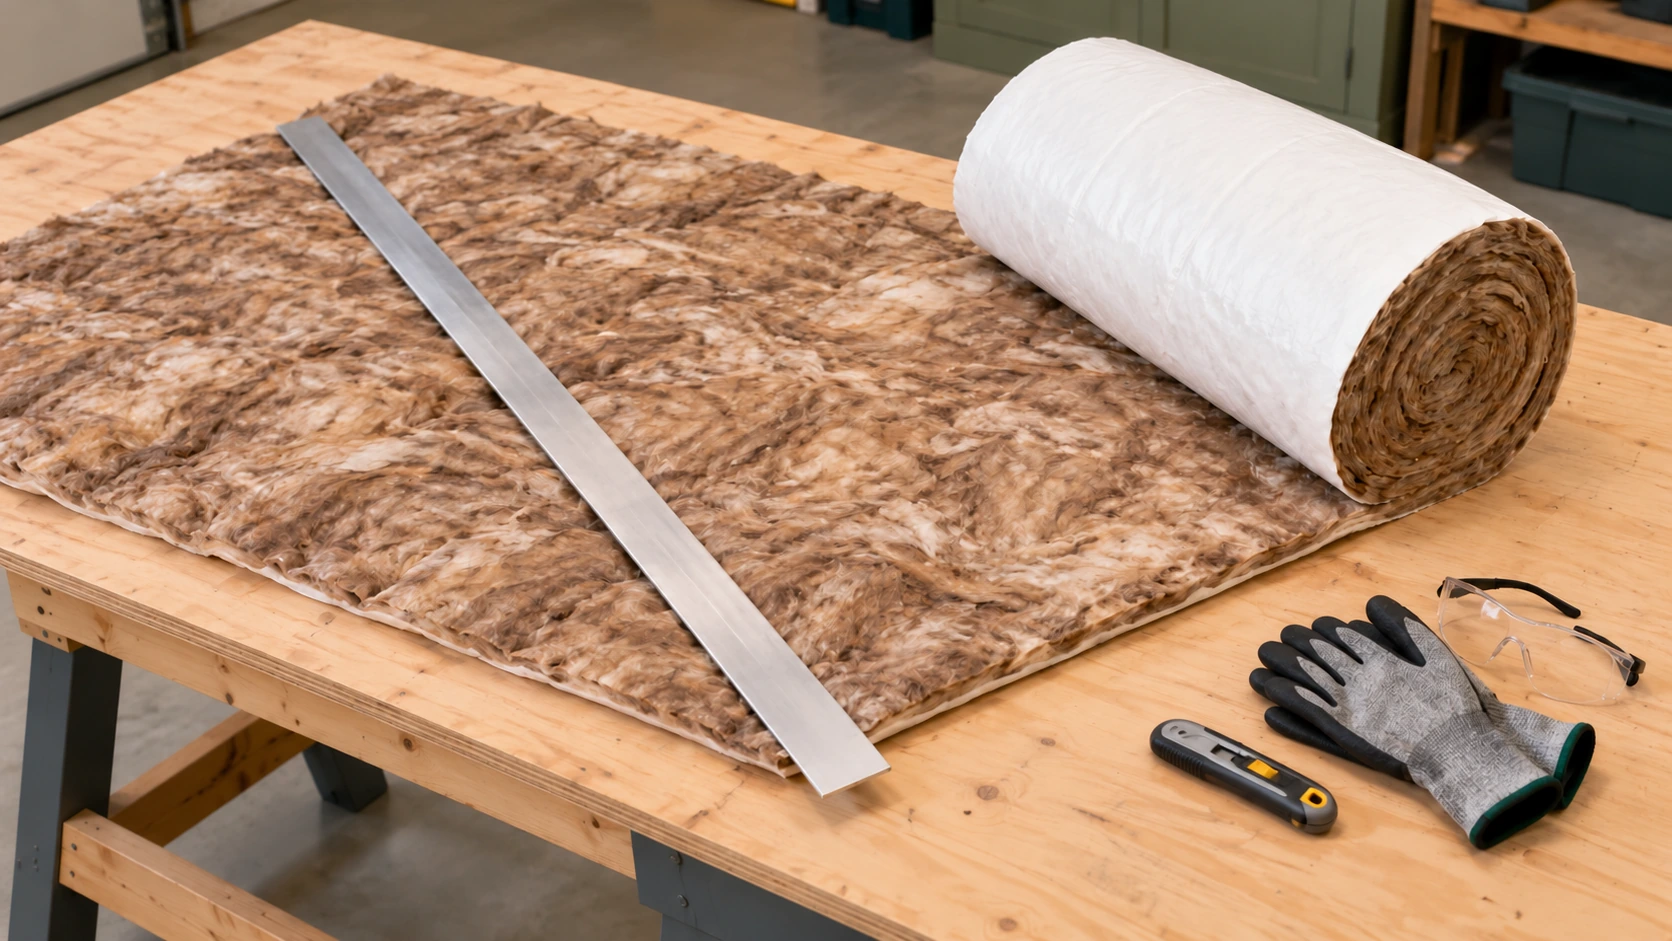
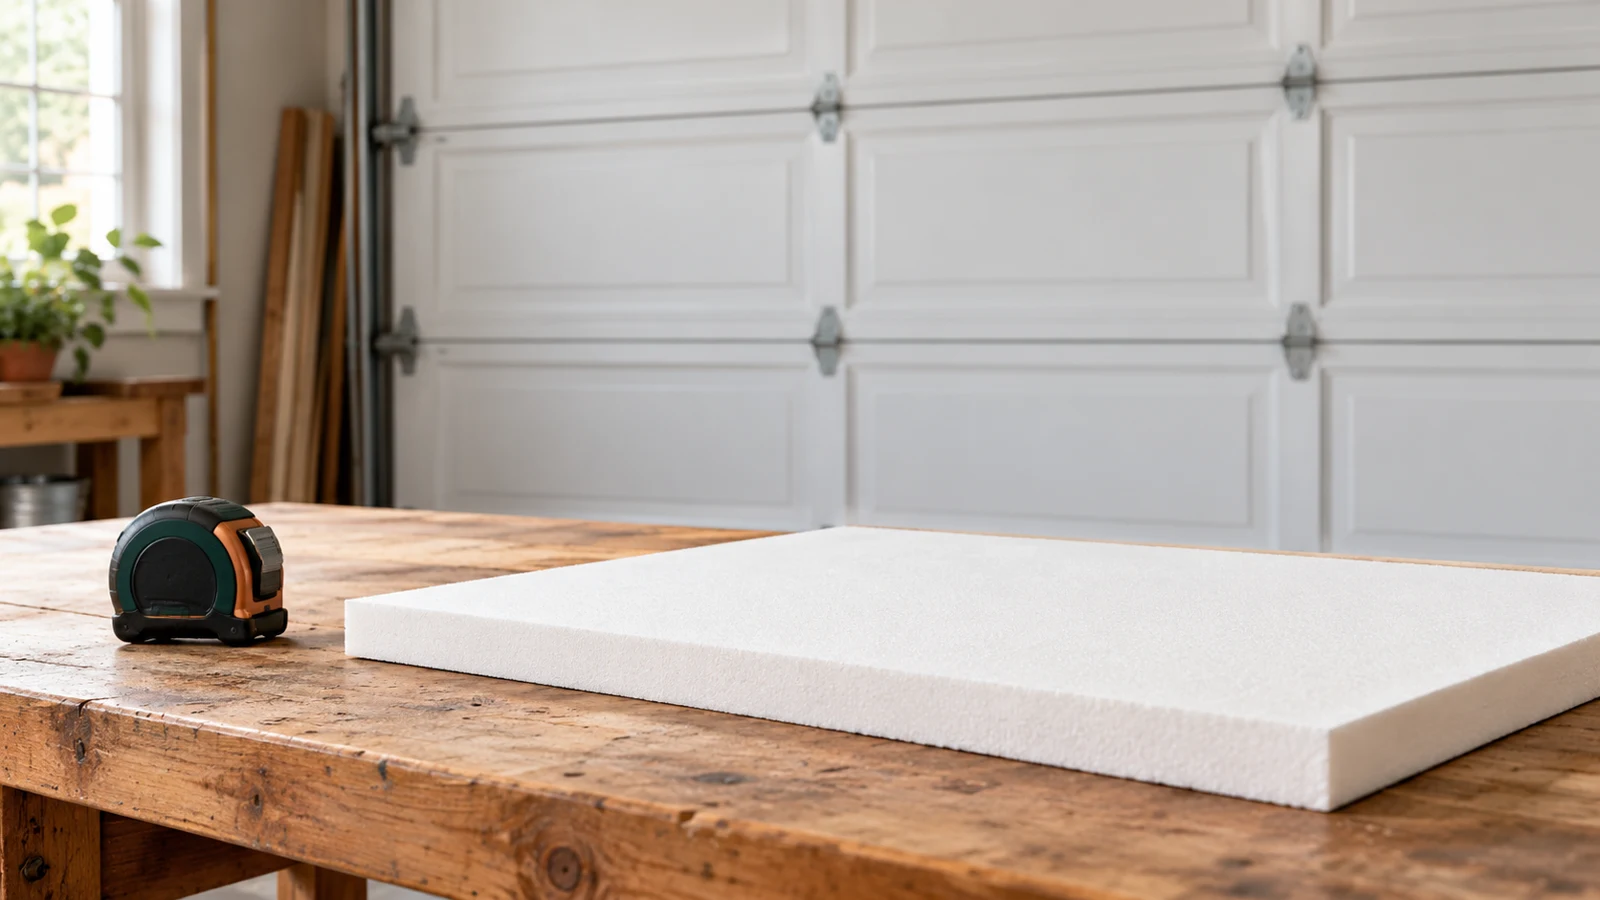
For this Knauf kit’s preparation example, the white facing is down and the fiberglass side is up on a separate cutting surface. The knife is retracted; no cutting or installed-door work is shown. Follow the kit’s complete instructions and the door-weight checks in this section.
Knauf kit: measure and retain one cavity at a time
This example is limited to the Knauf January 2024 kit on an approved compatible metal door with exposed channels. Account for all installed insulation and retaining rods. Arrange professional balance assessment; never adjust springs or increase opener force to compensate.
Scroll sideways for detail, or open the full-size diagram. The complete instructions are written below.
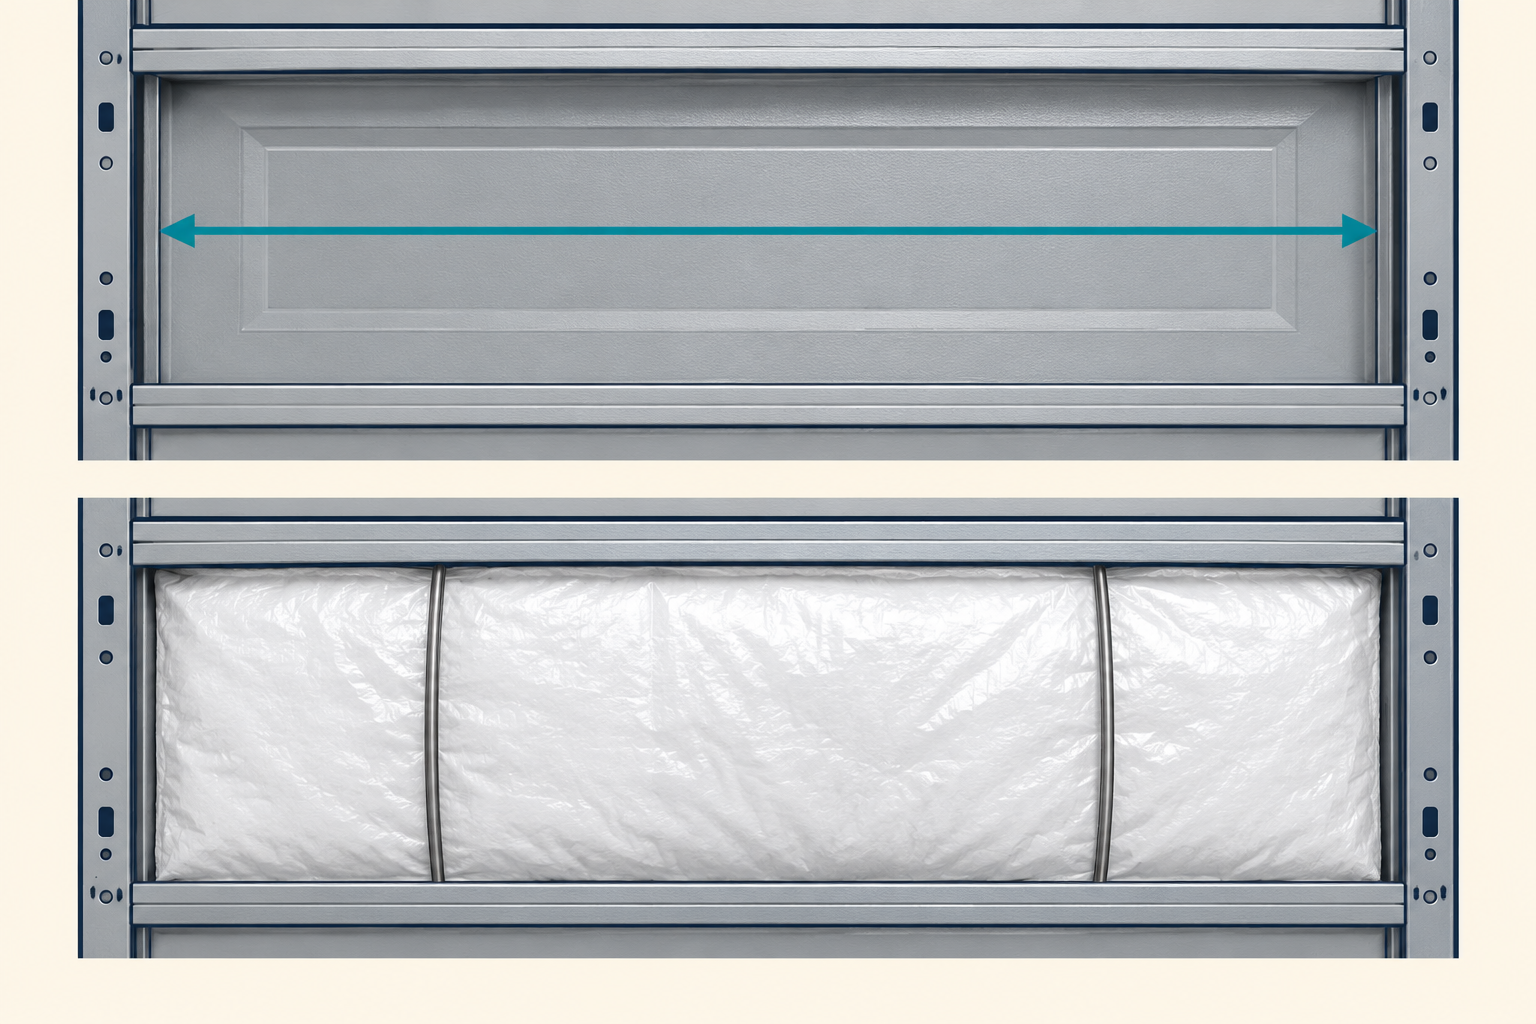
Open full-size diagram and zoom (new tab)
- Confirm the door manufacturer approves the named kit and assess the added installed weight before fitting it. Have door balance assessed professionally.
- Measure each cavity between its side channels. This kit’s instructions add 1 inch to that width and another 1 inch for each closed side channel. Verify the actual channel type before cutting.
- Place the white facing toward the garage. Keep the flexible fiberglass within one section and clear of joints and hardware.
- Fit the retaining rods outside the white facing. This kit specifies two rods about 10 inches from the sides; a cavity shorter than 30 inches uses one centered rod. Verify upper and lower groove seating against Figure 7 of the manual. These dimensions do not apply to another kit.
- Have the changed door’s balance, clearances and required safety tests checked before routine powered use. A neat fit alone does not establish correct balance.
Manufacturer reference 1 · Manufacturer reference 2
- Resolve suitability before purchasing. Send the door maker or technician the model, interior photographs and proposed kit information. Expected result: confirmation that the material, weight and attachment method are acceptable. If the door already binds, sags or has damaged hardware, repair that first rather than covering it.
- Create a cavity schedule. With the door safely closed and operation prevented according to the opener manual, measure each accessible intended cavity. Record width, height, depth and nearby hardware. Expected result: a labeled list, not an assumption that every panel is identical. Leave inaccessible areas for qualified help.
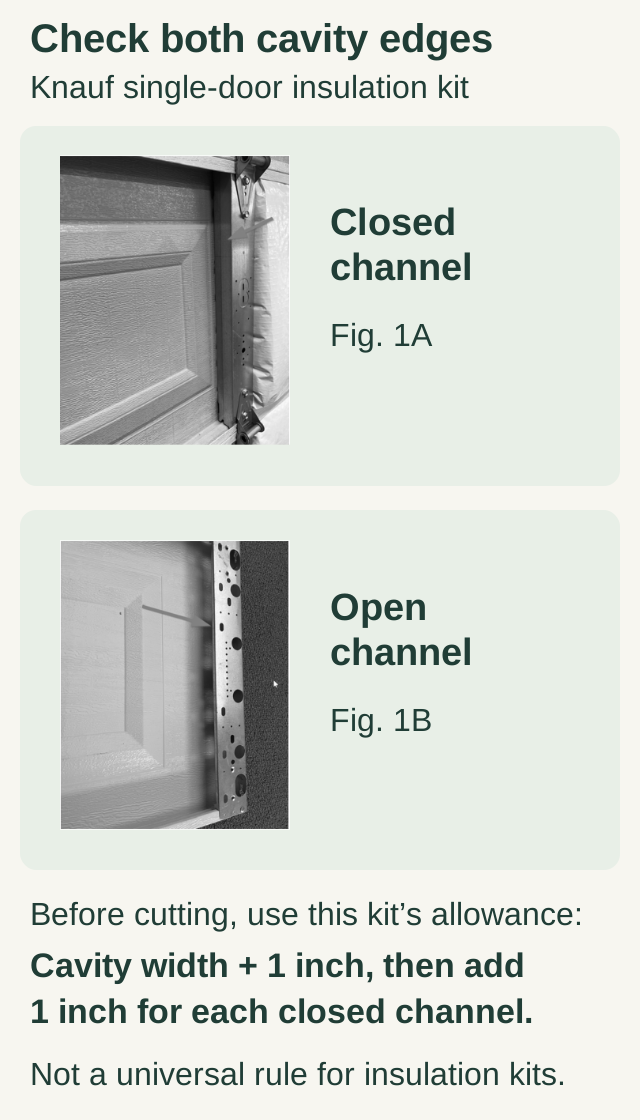
For the Knauf January 2024 kit, identify both cavity side channels before cutting. Its allowance is cavity width plus 1 inch, plus another 1 inch for each closed channel. Other kits can differ. Scroll within the image if needed, or open the full-size view. The key details are also written below.
The Knauf January 2024 kit photos distinguish a closed side channel, Figure 1A, from an open side channel, Figure 1B. Identify both cavity edges before cutting.
For this kit, use cavity width plus 1 inch, then add another 1 inch for each closed channel. Other kits can differ. Retain the preceding door/kit approval and full added-weight checks; this is not permission to adjust springs or loaded hardware.
- Plan the operating pause. Arrange another entrance and tell the household not to use the door until installation and the required assessment are complete. Expected result: no pressure to open a partly modified door to retrieve a car or tool.
- Prepare the specified attachment surfaces. Use only compatible cleaners and let surfaces dry. Do not remove reinforcement struts or hinges to make a larger opening. Expected result: clean approved attachment areas, with structural parts untouched.
- Cut and fit by the kit instructions. Work on the cutting bench, not against the installed door skin. Follow the kit's allowances, facing direction and retention method. Expected result: each piece remains securely within its intended space without compressing a joint or covering labels. If it requires force or makes hardware inaccessible, stop and recheck compatibility.
Knauf kit: edge fitting and rod seating details
- This example applies only to the Knauf white-faced fiberglass kit with metal retaining rods and an approved, compatible exposed-metal-channel door. Complete the door/kit approval and full added-weight assessment first. Keep a sound door closed, prevent operation and work only in safely reachable cavities.
- Do not change struts, hinges or loaded brackets, or cover joints, labels or hardware. Use the specified protective equipment and keep hands clear of pinch areas.
- Do not cycle the door before professional balance, clearance and safety verification. If the actual channel geometry does not match the specified grooves, stop rather than inventing another rod seat.
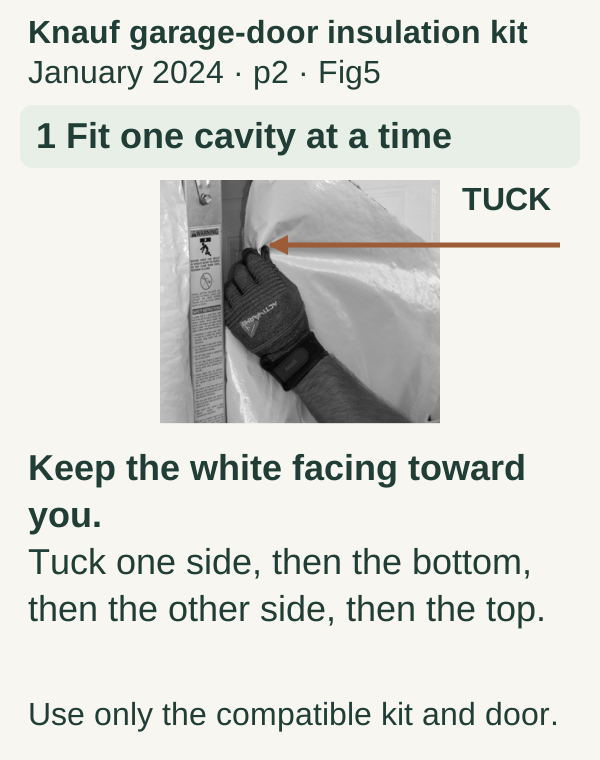
1 Fit one cavity at a time Scroll within the image if needed, or open the full-size view. The key details are also written below.
For the specified compatible Knauf kit, keep the white facing toward you. Tuck one side, then the bottom, then the other side, then the top. Follow the exact kit and door instructions.
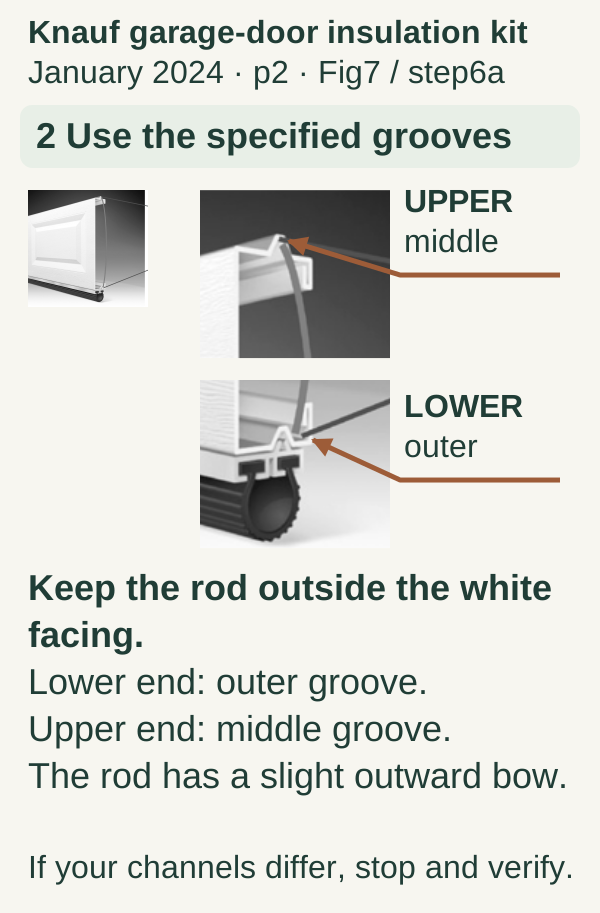
2 Use the specified grooves Scroll within the image if needed, or open the full-size view. The key details are also written below.
For the specified compatible Knauf kit, keep the rod outside the white facing. Seat the lower end in the outer groove and the upper end in the middle groove. The rod has a slight outward bow. If your channels differ, stop and verify.
- Check every cavity before movement. Look for loose edges, protrusions and scraps near rollers or sensors. Do not add improvised screws through the door or tape across section joints. Expected result: all material retained as designed, no interference and no hidden warning labels.
- Complete the professional handoff. Have the technician verify balance and any required adjustment, clearances through travel, opener suitability and safety tests before normal powered use. Expected result: a usable system, not merely a neatly covered interior.
What insulation can and cannot do
A kit's insulation rating is not a guaranteed temperature change for the whole garage. Gaps, walls, ceiling, sun exposure and how often the door opens affect the result. If a large draft comes through a torn seal, address that separately rather than adding thicker material to the panels.
Do not cover required ventilation openings. If you are changing the garage's use or planning heating equipment, treat that as a separate building and ventilation question.
Practical tip: Label cavity measurements on a sketch before cutting. A small left/right difference is easy to miss when several similar pieces are laid on the floor.
Common mistakes and safety
Avoid generic expanding spray foam, unapproved adhesives and heavy layered assemblies as substitutes for a specified system. Never remove structural reinforcement to make a kit fit. Keep cutting tools away from cables and the installed door.
FAQ
Will every kit require spring adjustment?
Not necessarily, but the effect must be assessed. Do not assume a small advertised kit weight is harmless for your particular door.
Can we add a second insulation layer?
Only with approval for the full assembly, its weight, clearances and fire requirements. More thickness is not automatically better.
Can we use the door before the technician arrives?
Plan not to. Schedule the work so the modified door is checked before it returns to normal operation.
Explore guides · About this guide
Was this guide useful?
Your choice stays in this browser only. It is not sent to us.
Sources & manuals2
Manufacturer instructions and references for this guide. Match the document to your exact product.
- Manufacturer reference 1www.knaufnorthamerica.com
- Manufacturer reference 2res.cloudinary.com