How to Replace a Garage Door Bottom Seal: Compatibility Comes First
Quick answer
Match the new seal to the door model and retainer profile, not just the door width. Replace it only under the manufacturer's procedure with a safe, verified access and door-support plan. Never loosen or remove the bottom corner brackets, cables or spring hardware to make the seal slide out.
For many doors, the work requires access beneath a raised door. If you cannot establish the exact approved support procedure and safely carry it out, the useful DIY portion is identification and measurement; a technician should complete the replacement.
Critical distinction: The flexible weather seal and its retainer are not the same as the bottom cable bracket. A nearby screw is not safe to remove merely because it is close to the seal.
Prerequisites and compatibility limits
Match the two retaining edges
This is a spare-strip compatibility check, not a direction to remove the door’s retainer or bottom bracket. If safe access, support or the matching part is uncertain, use a qualified door professional.
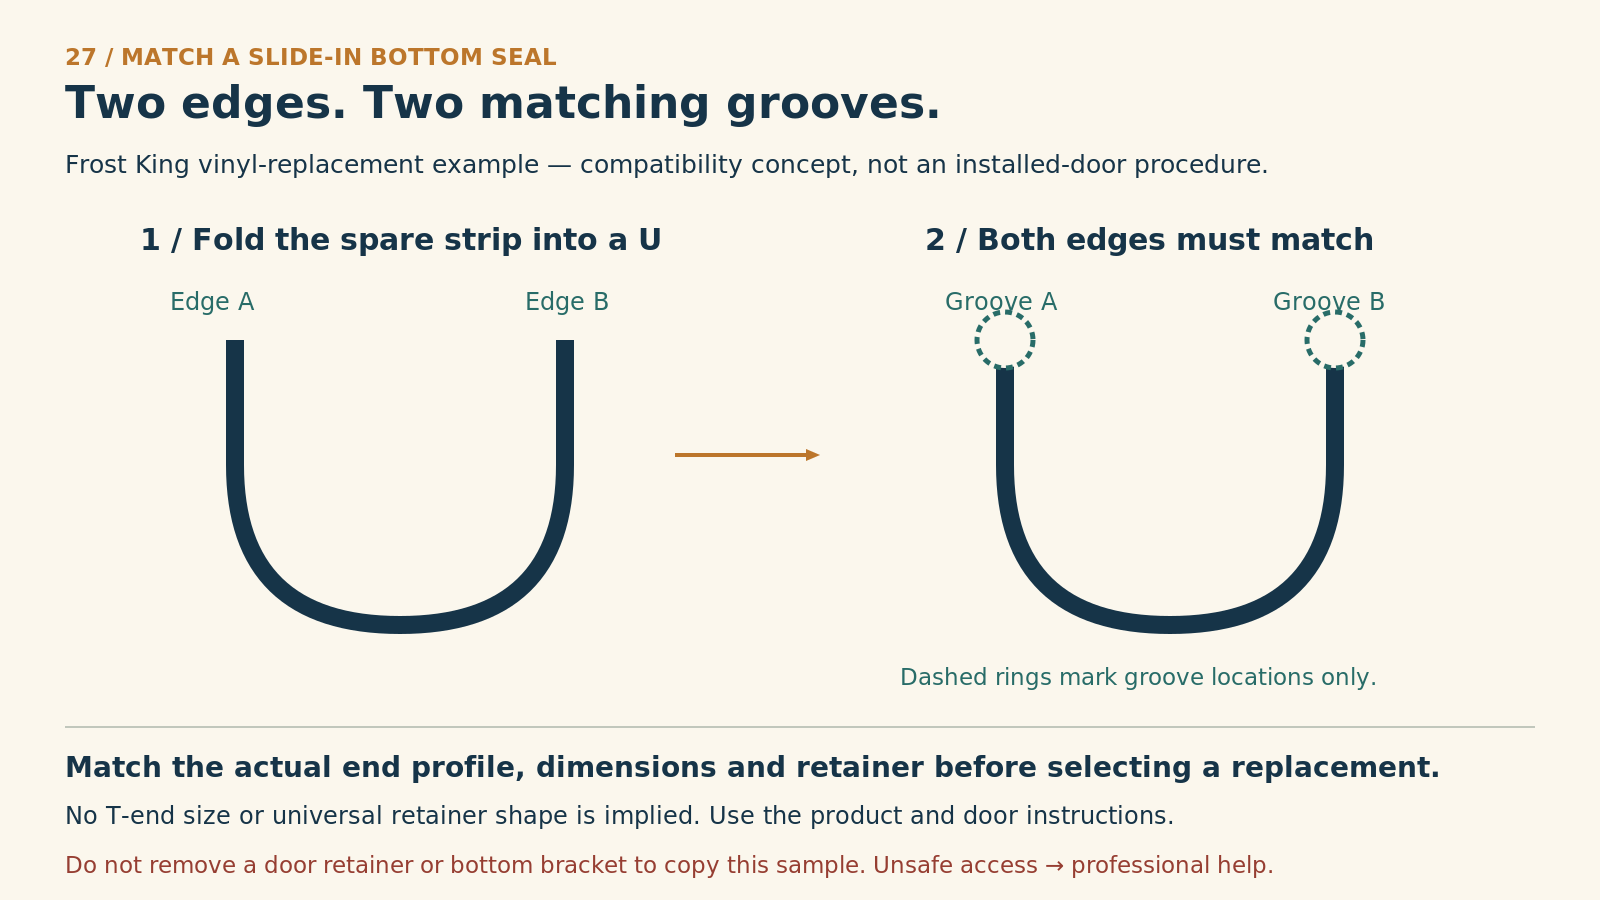
1. Two edges
The Frost King vinyl-replacement sheet forms this strip into a U. Identify both retaining edges on the spare product.
2. Two grooves
Both edges must match the actual retainer. Compare its profile, dimensions and model requirements before purchase. The dashed rings are locations, not a universal groove cross-section.
The drawing does not identify a T-end size, bead shape or interchangeable retainer. Do not open an uncertain door or remove tensioned hardware to obtain a sample. The door’s support and the product’s fit must be established before any installation work.

References
- Frost King vinyl bottom replacement instructions
Find the door's model and the original seal part number if available. Photograph the visible end profile without pulling apart hardware. Retainers may use different slots, beads or shaped ends; similar-looking seals can have different dimensions.
Page 2 of Clopay’s weather-seal instructions, for P/N 0620100 U-shaped astragal explicitly note that retainers vary and the correct replacement must be identified. The support and trimming instructions in that sheet apply to the named product, not every garage door.
Check whether the retainer is straight and intact. A damaged retainer, rotted bottom section or deeply corroded fastener area changes the job. Do not buy a larger seal to hide a structurally damaged door.
Tools and time
For identification, use a tape measure, flashlight, camera and the door paperwork. The actual installation tools, support equipment and cutting method come from the matched instructions. Do not assemble a generic clamp-and-ladder setup from a photograph.
Plan 20–30 minutes to identify and document the part. Installation time depends on access, retainer condition and support requirements; a corroded or trapped seal may need a service visit rather than a quick pull-and-slide replacement.
Step-by-step decision and replacement workflow
- Locate the actual gap. With the door safely closed, look for cracked, flattened or missing seal material. Expected result: evidence that the seal is worn. If the whole door is tilted or the floor slopes sharply, seal replacement alone may not solve the problem.
- Document the existing profile. Record the door model, width and visible seal/retainer shape. Photograph the ends from a safe position. Expected result: enough information for a confirmed match. Do not pull off the old seal as a sample if reinstalling it would require unsupported access.
- Confirm the replacement and procedure. Obtain the matching part and instructions, including specified trim allowance, retention details and support method. Expected result: a complete method applicable to your assembly. If a seller offers only “universal,” ask which exact dimensions and retainer it fits.
- Decide who can safely access it. If the job requires raising the door, its integrity and balance must be established and the manual's support procedure followed by someone competent to do so. An opener alone is not your work support. If this is uncertain, stop at preparation and arrange installation; do not improvise props or release an open unsupported door.
- Replace only the intended seal under the verified procedure. Where the matched instructions permit homeowner replacement, remove and feed the seal exactly as directed, with only the specified seal retainers or fasteners involved. Expected result: smooth fitting without stretching or force. A stuck profile, blocked end or uncertain screw means stop, not pry harder or loosen a bracket.
- Verify retention and final contact. The completed seal should stay seated and meet the floor as intended without excessive drag. Have the installer restore normal operation and perform relevant safety tests after any change. Expected result: improved contact with free movement, not a door driven harder into the floor.
Understanding the bottom-bracket hazard
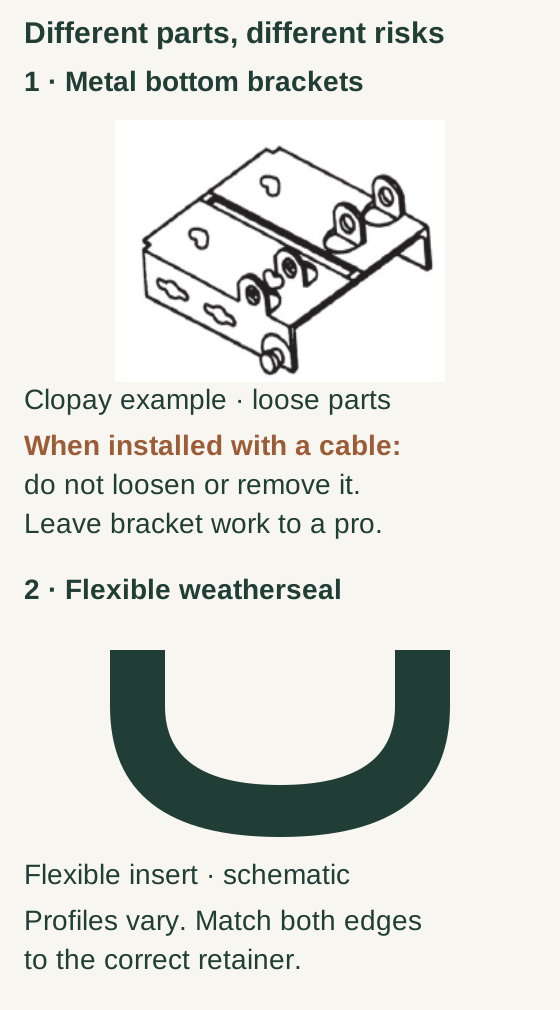
Scroll within the image if needed, or open the full-size view. The key details are also written below.
The Clopay example shows loose metal bottom-bracket parts, not their installed position. When installed with a cable, a bottom bracket must not be loosened or removed by the homeowner; leave bracket work to a professional.
The flexible weatherseal is a separate, schematic insert. Profiles vary: match both edges to the correct retainer. This comparison does not show cable routing or make bracket work safe.
The bottom cable attachment belongs to the counterbalance system. DASMA warns that bottom brackets are under substantial spring tension and should be loosened only by trained door-system personnel.
That warning still matters when the door is closed. “The door is resting on the floor” does not mean every component is unloaded. Red hardware or warning labels are helpful signals, but an unmarked fastener is not automatically safe.
Practical tip: Ask for the replacement part number on the service record. The next seal change becomes much easier when the correct profile is already documented.
Common mistakes
Do not stretch a replacement to reach the far end; use its specified installed length and trim allowance. Do not pack the seal with another material unless its manufacturer prescribes it. Do not adjust opener force or travel merely to squash a thicker seal.
Climaloc CF21079 — product-specific detail
- This CF21079 kit pairs an aluminum channel and vinyl insert with a backer rod. Its own instructions depict that rod inside the vinyl. This is a kit-specific component, not permission to stuff another seal or a replacement procedure for your door. Keep the safe-access and manufacturer-compatibility checks above.
Climaloc CF21079 installation instructions
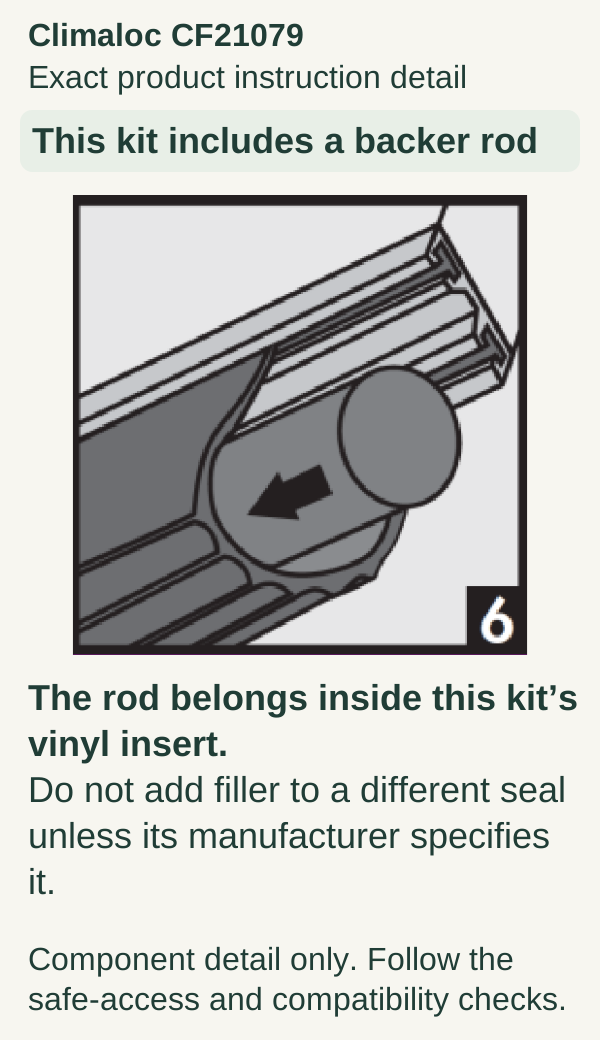
Scroll within the image if needed, or open the full-size view. The key details are also written below.
Climaloc CF21079 Exact product instruction detail This kit includes a backer rod The rod belongs inside this kit’s vinyl insert. Do not add filler to a different seal unless its manufacturer specifies it. Component detail only. Follow the safe-access and compatibility checks.
If water still enters, inspect where it begins. A sloping driveway or side gap is a different problem from an aged bottom strip.
FAQ
Can a larger seal fix an uneven floor?
Sometimes a manufacturer offers a suitable profile, but first establish the size and cause of the gap. Do not use a seal to conceal door misalignment.
Can we replace the metal retainer too?
That is a separate compatibility and fastening question. If it involves structural attachments or uncertain hardware, have a technician assess it.
Why not give a universal clamp location?
Track geometry, door condition and the applicable instructions vary. A generic diagram cannot establish that a raised door is safely supported for your job.
Explore guides · About this guide
Was this guide useful?
Your choice stays in this browser only. It is not sent to us.
Sources & manuals3
Manufacturer instructions and references for this guide. Match the document to your exact product.
- Frost King vinyl bottom replacement instructionswww.frostking.com
- weather-seal instructions, for P/N 0620100 U-shaped astragalcdn.clopay.com
- Climaloc CF21079 installation instructionsclimalocsolutions.com