How to Lubricate a Garage Door Without Greasing the Tracks
Quick answer
Lubricate only the points and materials specified by your door manufacturer, using its approved lubricant. For the covered Clopay-style guidance, keep the roller-running surfaces clean and unlubricated. Other manufacturers can specify different products and treatment points; follow the exact door manual rather than treating this as a universal track-lubrication ban. A scraping, crooked or unusually heavy door needs diagnosis, not another application of spray.
We recommend making a short lubrication map before opening the can: approved point, approved product, accessible with the door closed. Anything that does not meet all three checks stays off your DIY list.
Stop: Do not loosen a spring fitting, cable attachment, bottom corner bracket, hinge or track to reach a lubrication point. Maintenance does not make tensioned hardware safe to dismantle.
Before you start: model and material limits
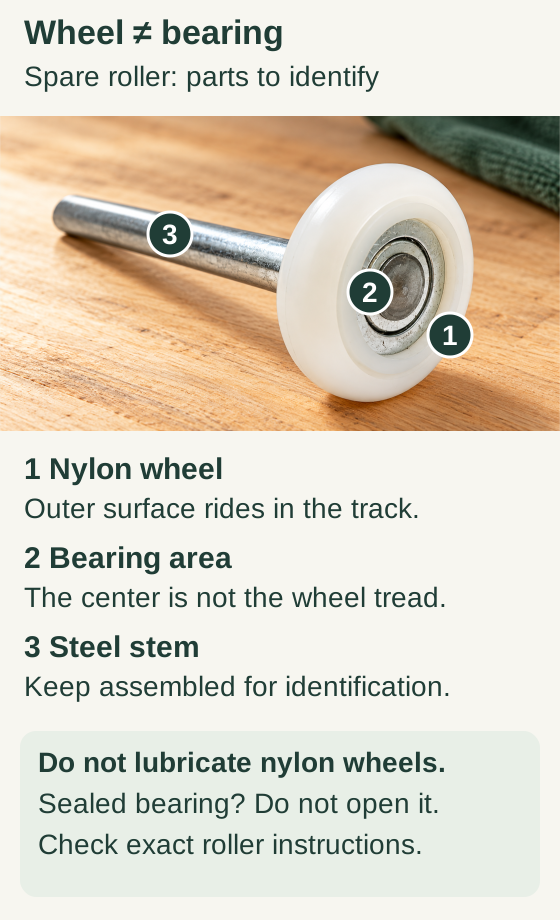
Scroll within the image if needed, or open the full-size view. The key details are also written below.
The callouts identify three different areas: 1, the nylon wheel; 2, the central bearing area; and 3, the steel stem. Keep the spare roller assembled for identification.
Do not lubricate nylon wheels or open a sealed bearing. The picture does not establish whether a particular bearing is sealed or permit lubrication of an exposed bearing; use the exact product instructions.
Find the door model, not just the opener brand. The opener may be made by a different company and has its own maintenance requirements. A screw-drive rail, belt and door roller are not interchangeable lubrication jobs.
Product recommendations genuinely differ. For example, Amarr's residential instructions specify a non-silicone product and exclude nylon rollers and tracks; do not substitute a generic recommendation for your model's instructions.
A nylon wheel may contain a bearing, but that does not mean you should spray its whole surface. A sealed bearing may require no homeowner lubrication. If you cannot identify the part, photograph it from a safe distance and ask the manufacturer.
Tools and time
Have the approved lubricant, clean cloths, eye protection, gloves appropriate to the product, and the two owner manuals. A short, accessible application may take 20–40 minutes, excluding diagnosis or work at height. That is a planning estimate, not a required service interval. Keep ignition sources away from aerosols and follow the product's ventilation instructions.
Step-by-step lubrication check
Hinge pivot only
Work only on an intact, fully closed door with operation prevented under the opener instructions, including backup power. Damaged or loose hinge? Stop and arrange service, not lubrication.
Match the permitted pivot
For the covered Clopay hinge, use the lubricant specified by the door’s care manual at the hinge pivot. The arrow identifies the pivot interface, not a mounting screw or the door-section gap. Keep fingers out of the joint; wipe excess from the exposed surface.
This close detail is not a fastener pattern, replacement-part identification or disassembly guide. Do not loosen hardware. No track, belt, spring, cable or roller application is instructed here.
Use the installed model’s instructions
Clopay web pages differ on track lubrication. This graphic covers the hinge only; it does not turn that disagreement into a universal rule. The exact installed door and opener instructions take priority, and uncertain guidance needs manufacturer confirmation.
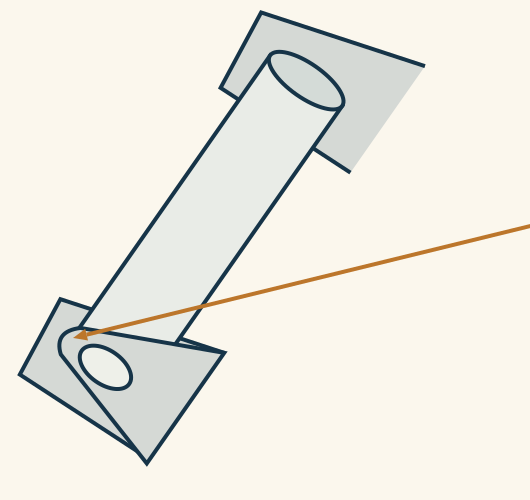
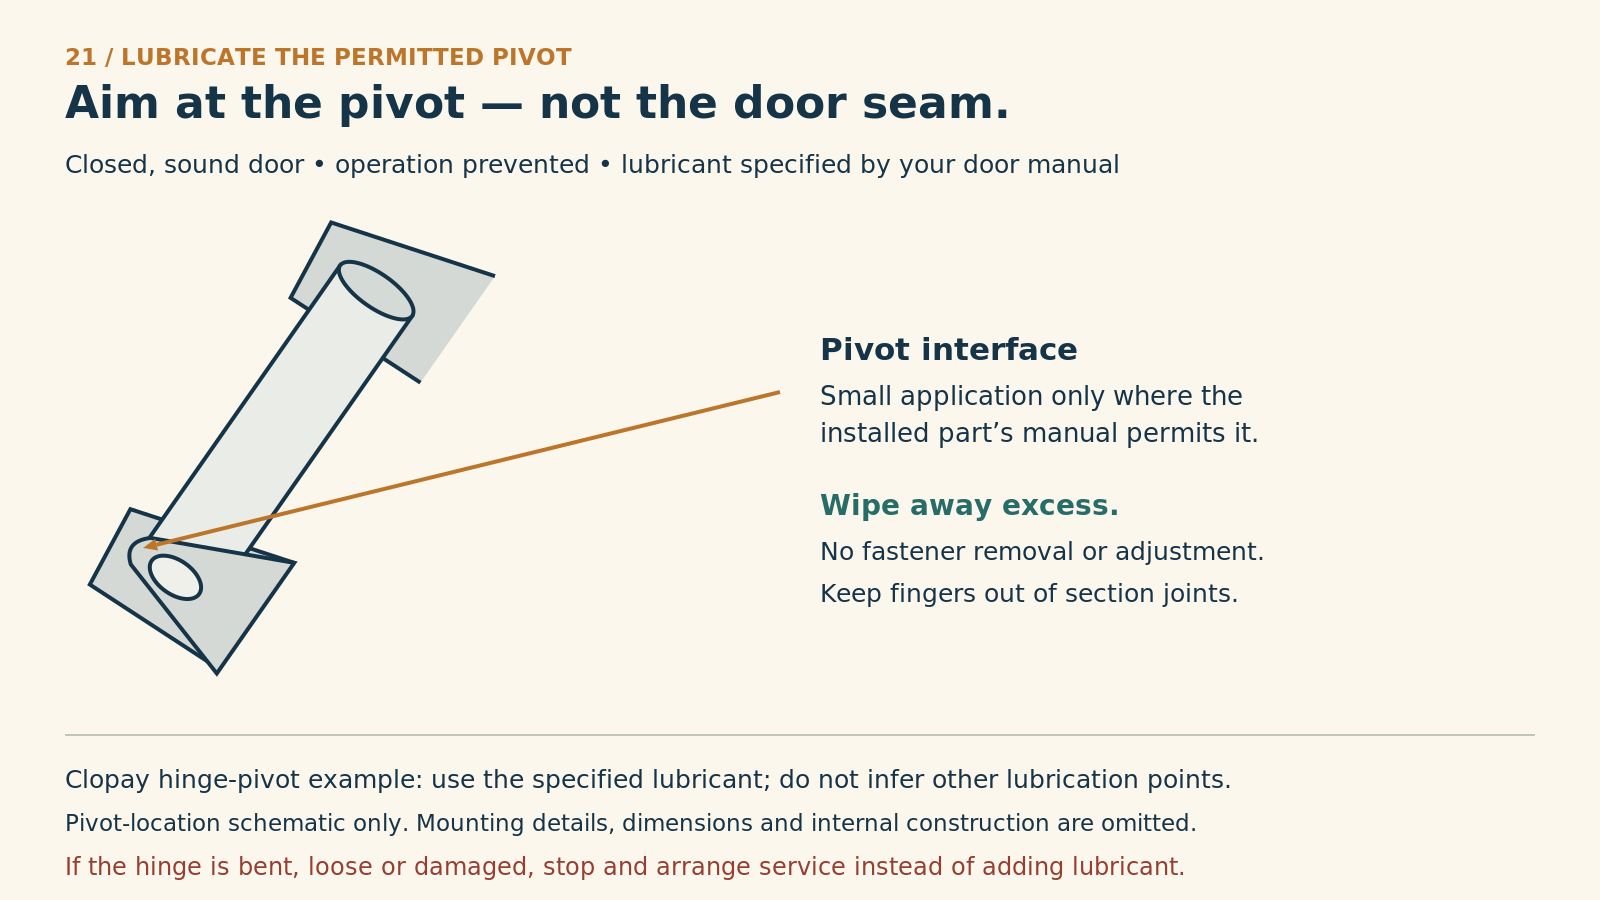
Reference. Clopay installation manual supplies part-location reference only, not homeowner repair steps.
- Start with the door closed and inspect first. Look for a tilted bottom edge, cable slack, damaged rollers or a visible spring gap without touching components. Expected result: an intact-looking door that has been moving normally. If it has recently banged, jammed or become heavy, stop and arrange service rather than moving it for access.
- Prevent unintended operation. Follow your opener manual's power-isolation procedure, including its battery-backup instructions. Tell everyone the door is out of use. Expected result: nobody can command a movement while your hands are near hardware. An app setting alone is not a substitute for the specified isolation procedure.
- Remove loose surface dirt. Wipe accessible, stationary approved points with a cloth; do not insert fingers between rollers and track or scrub cable strands. Expected result: you can see the point clearly. If debris is trapped behind hardware, leave it for service instead of removing the hardware.
- Apply a small amount at each approved point. Use the applicator to control placement; shield adjacent finishes with a cloth without wrapping it around moving parts. Expected result: a light application at the specified pivot or bearing, not runoff. Clopay likewise advises avoiding the tracks when lubricating rollers and removing excess.
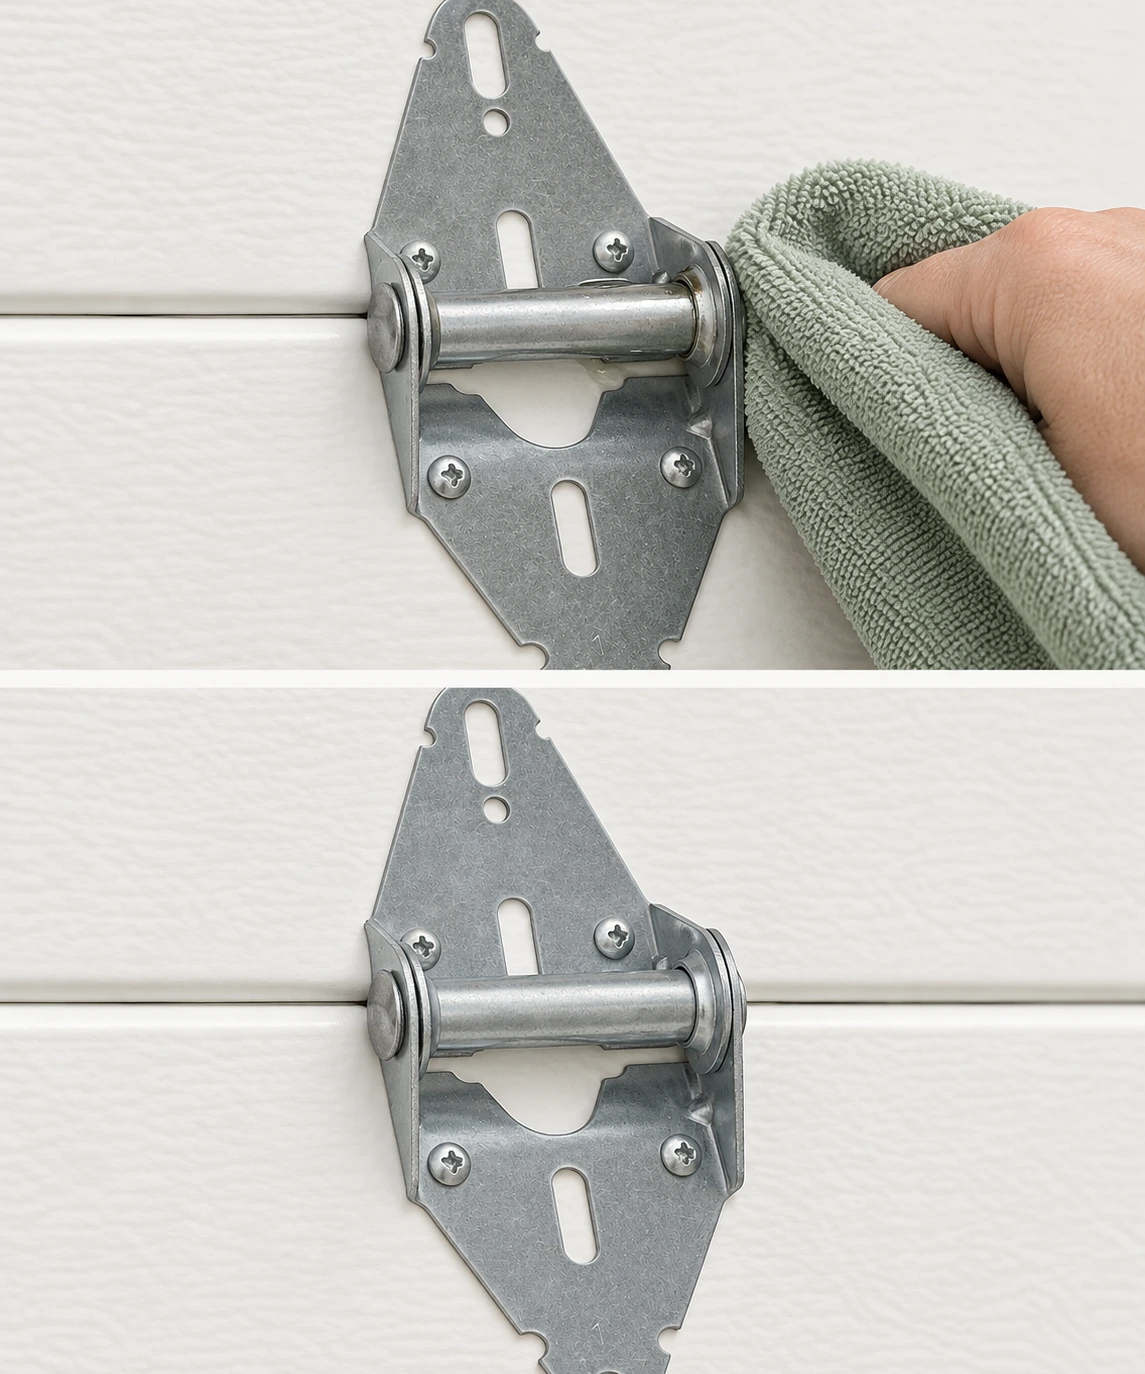
On an intact, fully closed door with operation prevented according to the opener manual, including backup power, wipe excess lubricant only from the exposed surface. Keep fingers out of the joint; do not move the pin or fasteners. For an intact, fully closed door with operation prevented according to the opener manual, including backup power, the first view shows a cloth wiping excess lubricant from the exposed center-hinge surface. The second shows the surface without visible drips.
Keep fingers out of the joint and do not move the hinge pin or fasteners. Use only the lubricant and points approved for the installed model. The finishing view does not prove correct balance, compatibility or successful maintenance.
- Clear the workspace before testing. Remove cloths, cans and tools; restore power according to the manual. Observe a normal cycle from a position outside the door's travel. Expected result: smooth movement without a new noise. If grinding remains, do not keep cycling and spraying until it disappears.
- Record the result. Note the date, product and locations treated, plus any noise that remains. This is more useful at the next inspection than simply recording “door serviced.”
Common mistakes and useful tips
A multi-purpose penetrating spray is not automatically a long-lasting lubricant approved for your door. Match the exact product type to the manual rather than relying on the word “garage” on a can. Likewise, do not assume all quieting sprays are suitable for rubber seals.
More product does not correct wear. A quiet first cycle followed by renewed grinding may indicate that the underlying problem remains. Stop and describe which part of travel produces the sound: beginning, curved track area or final closing. You can record audio from a safe position; there is no need to stand beside a moving roller.
Practical tip: Keep lubrication and track cleaning as separate checklist items. That small distinction helps prevent someone from greasing the track at the next maintenance visit.
Safety boundary
Leave inaccessible overhead points to a technician. Do not climb on the door, stretch across a ladder or release an open door to reach a component. A lubricant cannot repair a cracked hinge, frayed cable or broken spring.
FAQ
How often should we lubricate the door?
Follow the door manual's interval and inspect for changing conditions. Usage, product and environment vary; a universal monthly spraying rule can create unnecessary buildup.
Should the opener chain be sprayed too?
Only if its exact manual calls for it, with the specified product and procedure. Door maintenance instructions do not cover every opener drive.
Can lubrication fix a squeak?
It may help an approved dry moving point, but persistent or new mechanical noise needs investigation. Stop immediately if the door also binds or tilts.
Explore guides · About this guide
Was this guide useful?
Your choice stays in this browser only. It is not sent to us.
Sources & manuals2
Manufacturer instructions and references for this guide. Match the document to your exact product.
- Referencewww.clopaydoor.com
- Clopay installation manualliterature.clopay.com