How to Paint a Garage Door: Start With the Material and Finish
Quick answer
Paint a garage door only after confirming its material, existing finish and manufacturer-approved coating system. Clean and prepare it as specified, protect working parts and labels, and follow the coating's weather, drying and curing requirements. Do not seal sectional joints with paint or dismantle the door to reach hidden edges.
We recommend choosing the coating before choosing the color. A visually suitable color is not enough if its chemistry, heat absorption or preparation requirements conflict with the door.
Warranty check: A repaint can change finish-warranty coverage. Amarr, for example, states that non-factory painting voids its paint-finish warranty. Read the terms for your own model before beginning.
Identify the door first
Steel, aluminum, wood, vinyl and composite overlays require different preparation. A printed wood-grain finish is not bare wood. If the existing coating is unknown, obtain advice before sanding or applying a solvent.
Look up the exact model's repainting instructions, including color restrictions and whether specific reflective coatings are required. Clopay distinguishes model-dependent paint requirements rather than offering a single rule for every door.
If the door is dented, delaminated, deeply corroded or binding, solve that problem before cosmetic work. Paint will not restore structural integrity or correct movement.
Tools, time and preparation
Depending on the approved system, you may need mild cleaning supplies, compatible primer and paint, suitable brushes or rollers, masking materials, drop cloths and protective equipment specified by the product. Only use abrasives if the door instructions permit them. Unknown old coatings need assessment before disturbing them.
Plan a project day or more, with drying, recoat and cure intervals set by the actual products and conditions. This is not a promise that the door can return to use that evening. Arrange another way in and out, and check that the weather window covers the entire required process.
Step-by-step repaint plan
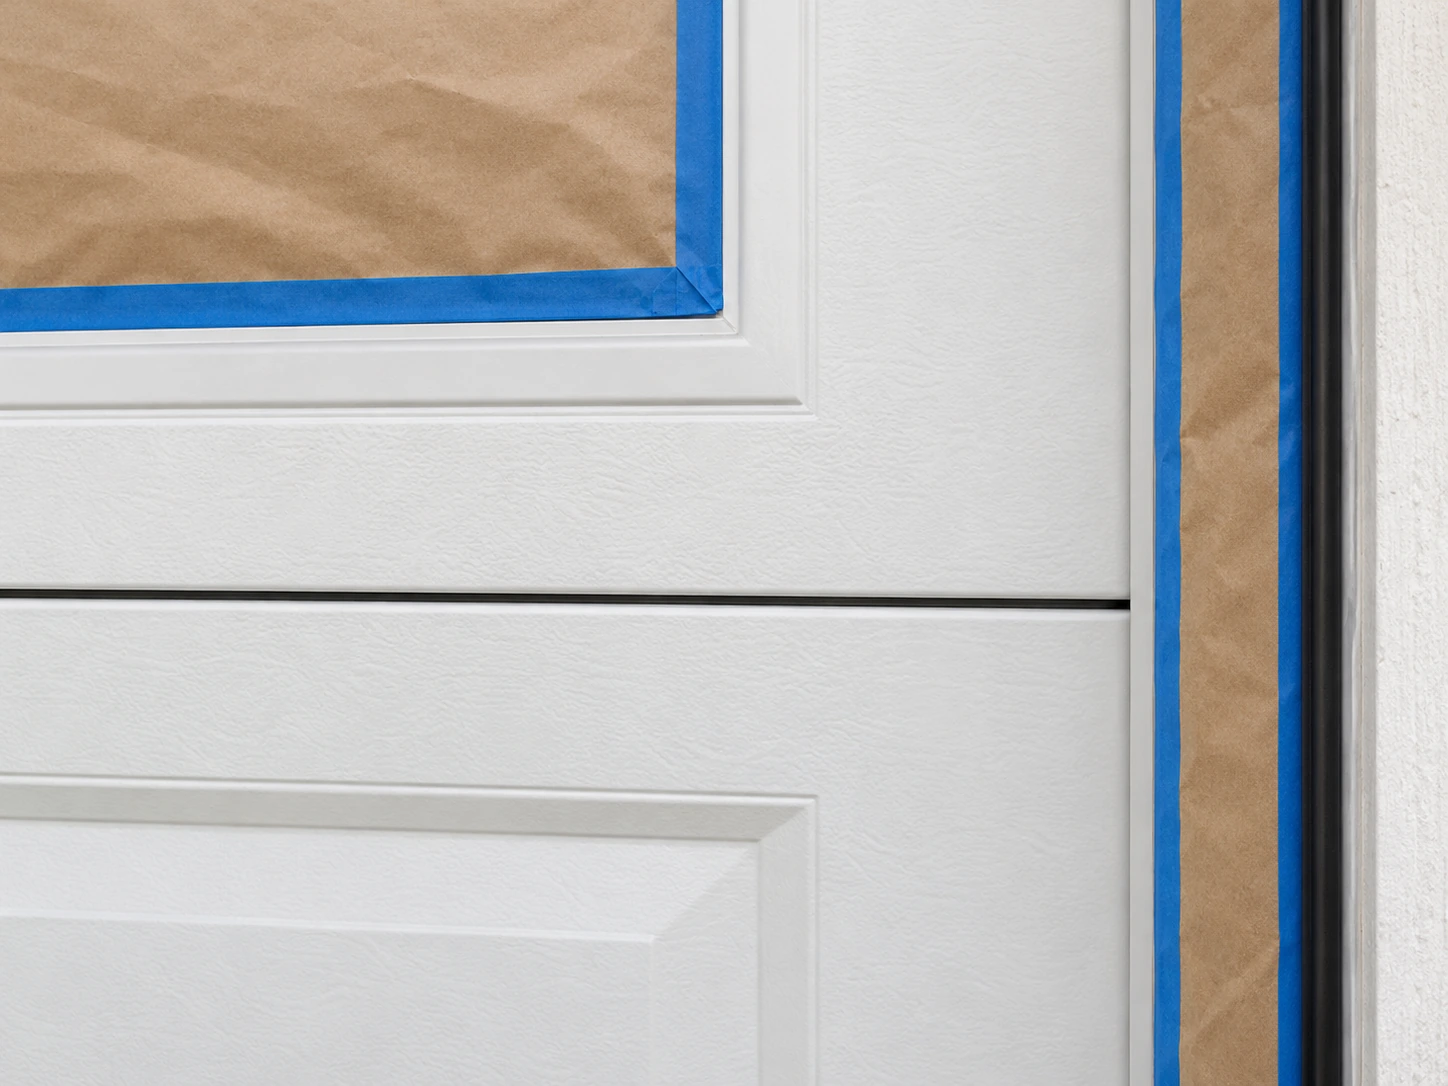
Choose masking and coating products compatible with the actual finish. Keep moving section joints clear. This view does not show protection for every functional part; follow the complete preparation checks below.
Test the coating before painting the door
Clopay steel-door example; Lustra excluded. Confirm your door’s finish and current care manual first. The covered steel-door instructions specify exterior 100% acrylic-latex paint, not oil-based or alkyd-modified paint. Other materials, overlay products and finishes need their own instructions.
Between the brush and tape steps: let the test patch dry for the paint manufacturer’s specified time, then inspect for blistering or peeling. Stop if either appears. Only then apply tape and peel it back.
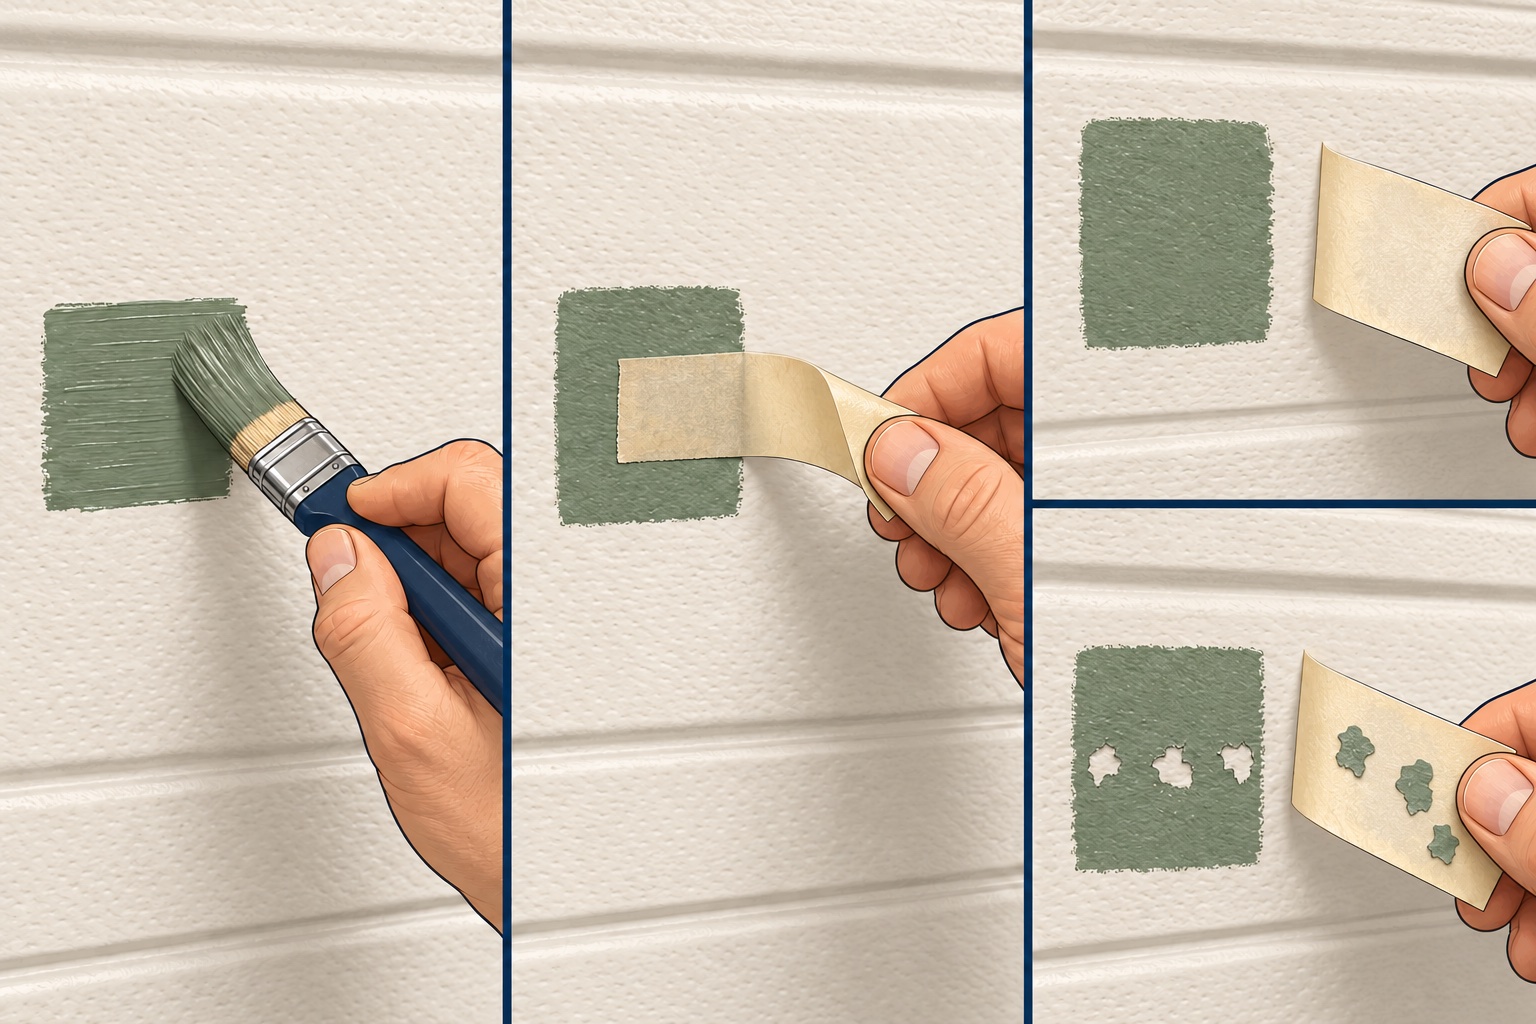
1. Small test patch
Prepare the surface under the door manual and paint instructions. Apply to a small area away from joints, seals, hardware and labels.
2. Dry, then peel
Wait the coating manufacturer’s specified drying time. Inspect for blistering or peeling, then apply masking tape over the patch and peel it back.
3. Read the result
If paint lifts onto the tape, blisters or peels, do not proceed. Resolve preparation or paint compatibility. An intact test patch is not a guarantee of long-term durability.
Keep the door stationary and prevent operation during hands-on work according to the opener instructions, including backup power where fitted. Do not open the door to reach seams, remove hardware, or cover warning labels. Follow the coating’s ventilation, protective-equipment and application-temperature instructions.
The drawing is one adhesion check, not a complete painting procedure. It does not specify a solvent recipe, universal curing time or dark-color approval.
Reference
Clopay Steel Garage Doors Care & Maintenance, pages 5–6.
- Confirm compatibility in writing. Match the door material, model and current finish to the primer, topcoat and permitted color. Expected result: a complete coating system with instructions, not a paint-store color match alone. If the door maker and paint maker disagree, resolve that before buying or applying products.
Read the coating use and binder fields before choosing a paint
- This BEHR 4050 technical-data-sheet example shows where to read the use category and binder type. It is not a brand recommendation or approval of this product for your door.
- Identify the exact door finish and follow its current manufacturer instructions. The referenced Clopay guidance applies only to its covered steel-door finishes and excludes Lustra; do not generalize it to every door.
- Compare the current coating data sheet with the approved finish system, color and preparation requirements. Acrylic content alone is insufficient. Do not transfer generic sanding, solvent-cleaning or steel-preparation advice to a factory-finished door.
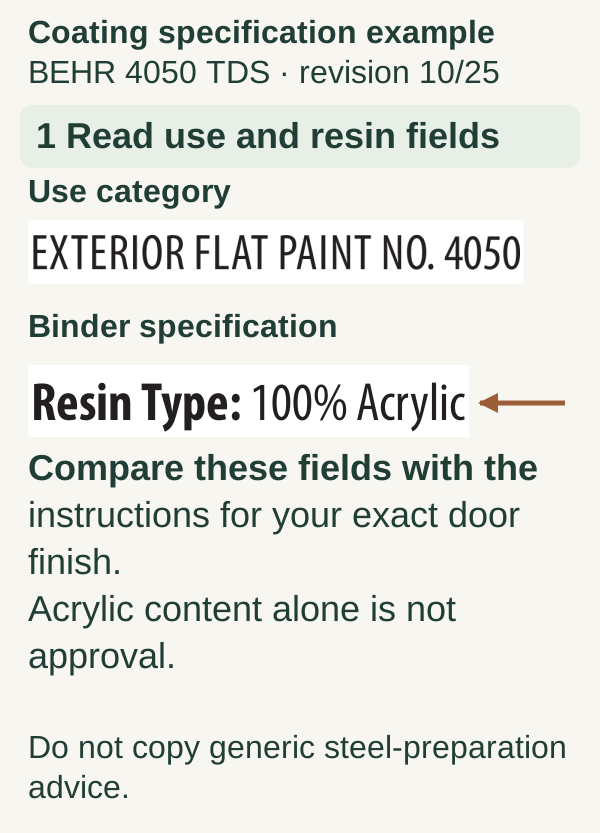
1 Read use and resin fields Scroll within the image if needed, or open the full-size view. The key details are also written below.
Coating specification example BEHR 4050 TDS · revision 10/25 1 Read use and resin fields Use category Binder specification Compare these fields with the instructions for your exact door finish. Acrylic content alone is not approval. Do not copy generic steel-preparation advice. Source fields: EXTERIOR FLAT PAINT NO.4050. Resin Type:100%Acrylic.
- Check operation and surface condition. Start only with a door that operates normally and can remain safely closed while the accessible faces are prepared. Photograph damage. Expected result: cosmetic wear that the approved preparation can address. Structural damage or a new movement problem requires separate service.
- Wash and allow adequate drying. Remove contamination using the finish-safe method. Do not paint over soap residue, damp joints or loose coating. Expected result: the clean, dry substrate required by the coating instructions. A water-beading or oily area needs identification rather than extra paint.
- Prepare only as instructed. Treat compatible minor imperfections and bare areas using the approved method. Keep dust away from sensor lenses and moving parts. Expected result: a suitable surface without unnecessary removal of factory protection. Stop if you discover extensive corrosion or a coating reaction.
- Mask functional areas. Protect safety labels, windows as appropriate, seals, locks, sensors and hardware. Keep joints free of bridging paint. Expected result: only the approved surfaces receive the finish. Do not remove a hinge, bottom bracket or cable attachment to improve access.
- Apply the specified coats. Follow product limits for temperature, moisture, direct sun, thickness and recoat timing. Work in manageable areas to maintain a consistent finish. Expected result: even coverage without heavy accumulations at edges. Avoid inventing a universal number of coats; the substrate and product determine that.
- Let the coating cure and inspect. Remove masking according to the coating instructions and check that labels remain readable and seals are not stuck to the face. Return the door to use only when the coating and door instructions allow. Expected result: free movement and intact safety features; any sticking or changed operation needs attention before repeated cycling.
Common mistakes and useful tips
Do not pick the darkest color without checking the door's restrictions. Manufacturer guidance warns that heat-related effects can depend on construction and exposure. Likewise, “exterior paint” is not a complete compatibility specification.
Do not force a painted joint open. Stop and seek guidance rather than tearing a seal or putting fingers into the section gap. Do not use the opener to break the door free from sticky perimeter weatherstripping.
Practical tip: Keep the product names, batch/color codes and application dates with your door paperwork. That is more useful for a later touch-up than a photograph of the paint color.
Safety and follow-up
Leave high or inaccessible faces to someone equipped for safe access. Do not stand on the door or work beneath a partly raised door. A substantial change in coating weight or other added materials warrants a professional balance assessment; never adjust springs yourself.
FAQ
Can we paint rubber weatherstripping?
Not as part of this procedure. Keep flexible seals free of coating unless their manufacturer explicitly allows a compatible treatment.
Can we paint over faux wood grain?
Sometimes, but model-specific finish instructions control the answer. Painting can permanently change the appearance and warranty.
Must the door be removed?
Routine face repainting should not become homeowner door disassembly. If the required system needs inaccessible section edges treated, plan qualified help.
Explore guides · About this guide
Was this guide useful?
Your choice stays in this browser only. It is not sent to us.
Sources & manuals1
Manufacturer instructions and references for this guide. Match the document to your exact product.
- Clopay Steel Garage Doors Care & Maintenance, pages 5–6literature.clopay.com