Wall-Mount and Jackshaft Openers: How They Work and When They Fit
Short answer: A residential wall-mount opener turns the torsion shaft beside a compatible sectional garage door instead of pulling a trolley along a ceiling rail. It can free the center ceiling, but it still needs the correct shaft, drums, track arrangement, side clearance, power supply and safety equipment. An empty patch of wall is not enough to establish compatibility.
This is a planning guide for a homeowner comparing an existing door with the requirements of a specific opener. It is not a spring-conversion or opener-installation procedure. LiftMaster 98022 and the Genie Wall Mount Pro manual linked for model 6170H provide the examples below; their dimensions and features must not be mixed.
 Open full diagram
What the motor actually moves
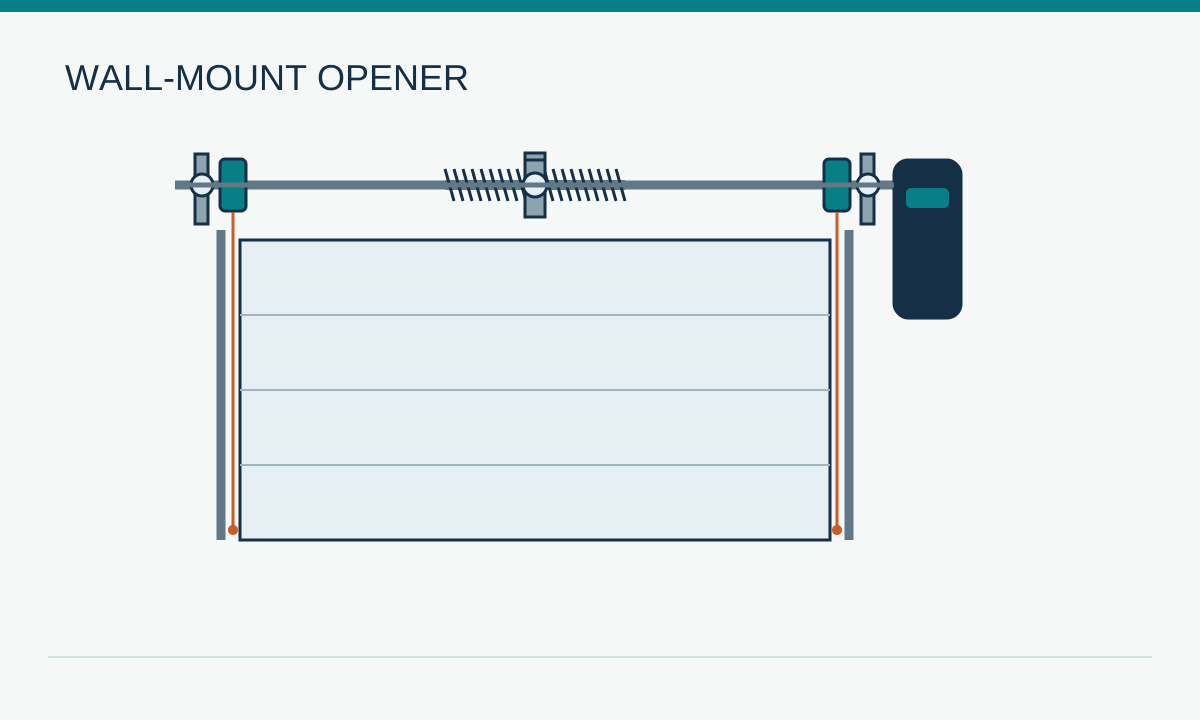
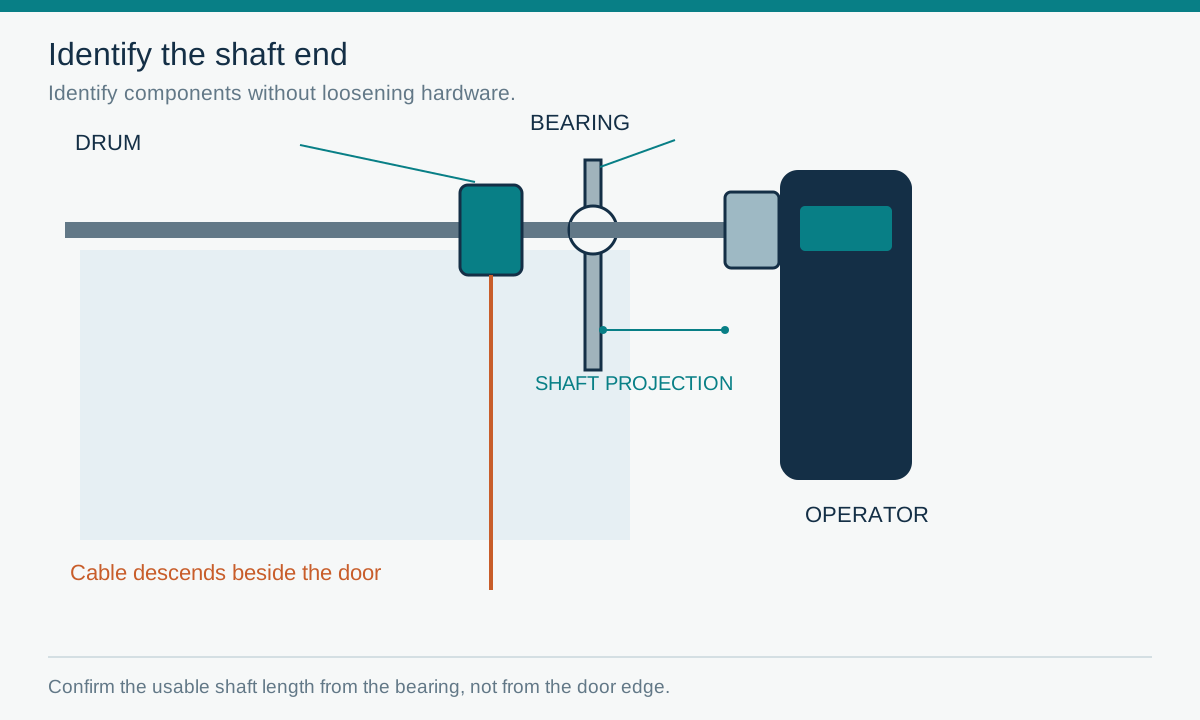
On the direct-coupled arrangements covered here, the operator sits at one end of the torsion shaft, outboard of the drum and end bearing. The motor rotates the shaft. Drums on that shaft wind or unwind the lift cables that run beside the door to its lower attachments. The springs counterbalance the door; the motor does not replace that counterbalance.
The sectional door still needs its rollers, vertical tracks, curved sections and overhead tracks, or its approved high-lift or vertical-lift track arrangement. Removing the trolley rail does not remove the space occupied by the open door. It also does not turn a low-headroom outside-pickup cable arrangement into a compatible one.
“Jackshaft” describes the drive arrangement, not a universal fit category. Commercial operators, residential direct-coupled units and approved offset mounting kits have different requirements. This guide addresses residential units and does not provide instructions for an indirect chain-coupled installation.
Step 1: identify the door and spring arrangement
With the door already fully closed, take a photograph from inside the garage from a safe position on the floor. Do not move an unsafe or open door just to photograph it. Capture the entire opening, the spring assembly above it, both cable drums and both ends of the shaft. Record the door manufacturer and model if a label is readable without reaching into the mechanism.
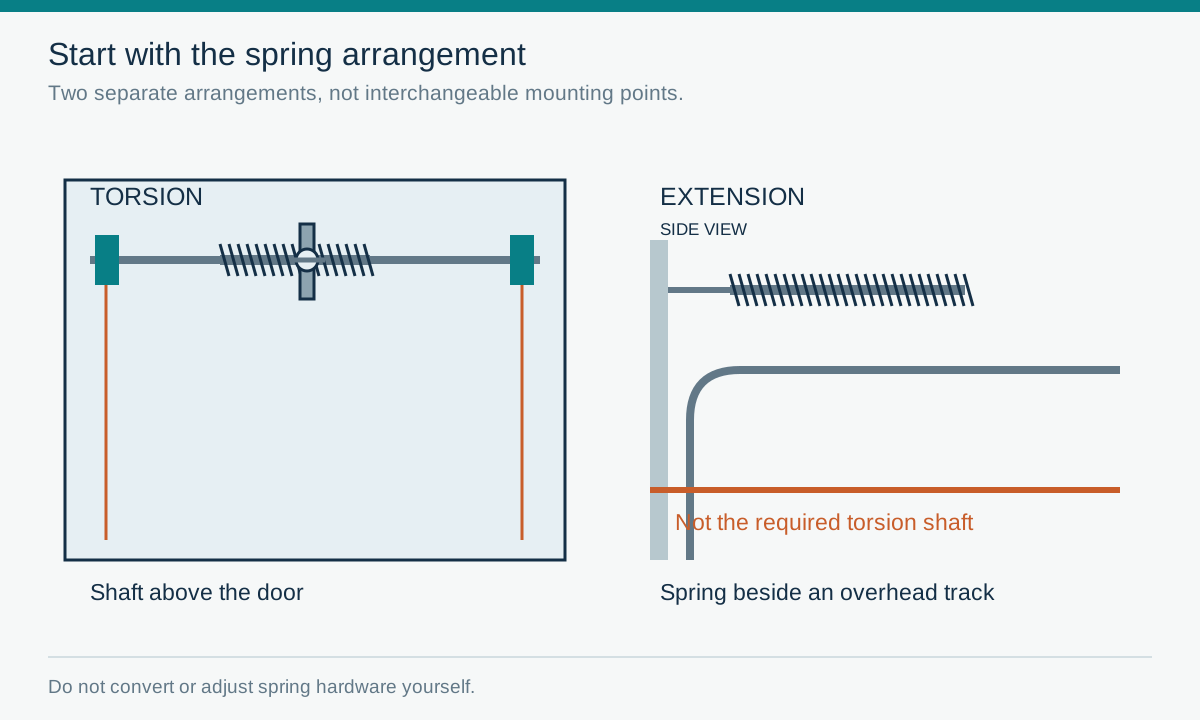
- Sectional door with front torsion assembly: a possible starting point, not a fit approval.
- Extension springs beside the overhead tracks: not the torsion-shaft arrangement required by these examples.
- One-piece, rolling or otherwise different door: do not assume residential sectional-door approval covers it.
- Rear torsion, enclosed proprietary systems or an unclear shaft: ask the installer to identify the system and document compatibility before selecting equipment.
 Open full diagram
Step 2: check the shaft, drums and lift type together
The installer needs more than the door width. Useful information includes the shaft diameter and construction, usable shaft extension beyond the bearing, drum identification, lift type, door height and width, and the door’s condition. Photograph readable drum markings using zoom rather than touching or turning the drum. Do not guess door weight from the size or insulation.
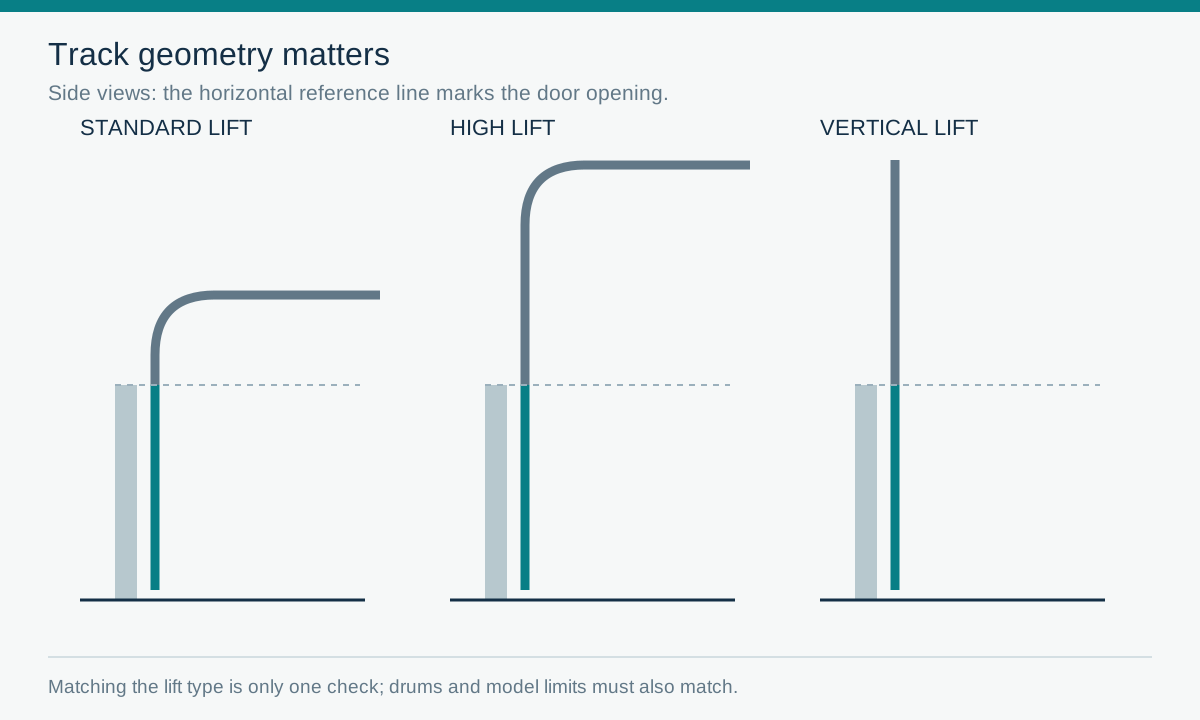
The linked 98022 manual calls for a 1-inch torsion bar and excludes reverse-wound drums. It covers specified standard-lift, high-lift and vertical-lift sectional arrangements. Its planning page lists standard/high-lift doors up to 14 feet high, high lift up to 54 inches, and doors up to 18 feet wide. Drum restrictions still apply: the 3–3.9-inch drum allowance, for example, is limited to doors up to 430 pounds. Do not treat the product’s maximum capacity as permission for every drum and door combination.
The current Genie Wall Mount Pro manual linked from the 6170H support resources specifies residential sectional doors with front torsion springs. It allows 1-inch solid shafts or specified 14- or 16-gauge hollow steel shafts, with or without a keyway. Its listed combinations include standard, high and vertical lift up to 14 feet, high lift up to 84 inches, and limits of 18 feet wide, 180 square feet and 850 pounds balance weight. Its named drum families or equivalents must also match. It excludes low-headroom outside hookup/reverse-wound drums. Verify this manual against the actual model suffix and serial label.
 Open full diagram
Decision: if the drum, lift type or shaft cannot be positively matched to the chosen manual, pause the purchase. A technician must resolve that mismatch. Changing springs, shaft length, drums or track geometry is not a homeowner fitting adjustment.
 Open full diagram
Step 3: measure the right spaces, from the right origins
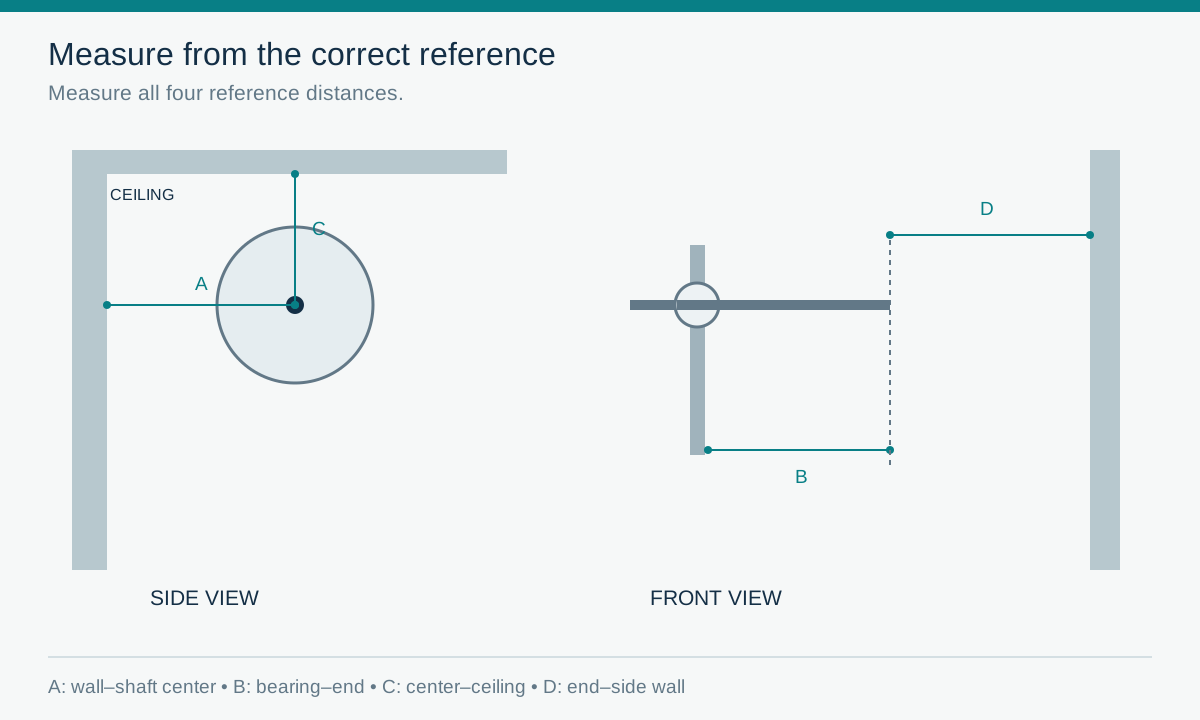
A room dimension from the door opening to a side wall is not the same as clearance from the shaft end. Likewise, “space above the door” is not necessarily space above the shaft center. Have the installer verify each reference point and the operator’s complete mounting envelope, including trim, shelving, pipes and framing.
 Open full diagram
LiftMaster 98022: planning-page examples
- Wall to torsion-bar center: at least 2.5 inches.
- Ceiling to torsion-bar center: at least 3 inches.
- Shaft end to side wall or obstruction: at least 8.5 inches.
- Shaft extension past the bearing: at least 1.5 inches, with the manual noting that installation requirements can vary.
Genie: linked Wall Mount Pro manual examples
- Wall to torsion-shaft center: 2.5–6 inches, a range rather than just a minimum.
- Ceiling to shaft center: at least 2.25 inches.
- Shaft end to side wall: at least 7 inches.
- Shaft extension beyond bearing plate: at least 2.25 inches.
These are model-document examples, not interchangeable industry standards. Both arrangements can mount on either side when all requirements are met. Sufficient clearance on one side does not prove that the other side works. The mounting bracket also needs the structural support specified by the manufacturer; bare drywall is not a mounting solution.
Step 4: locate power before assuming the old outlet will work
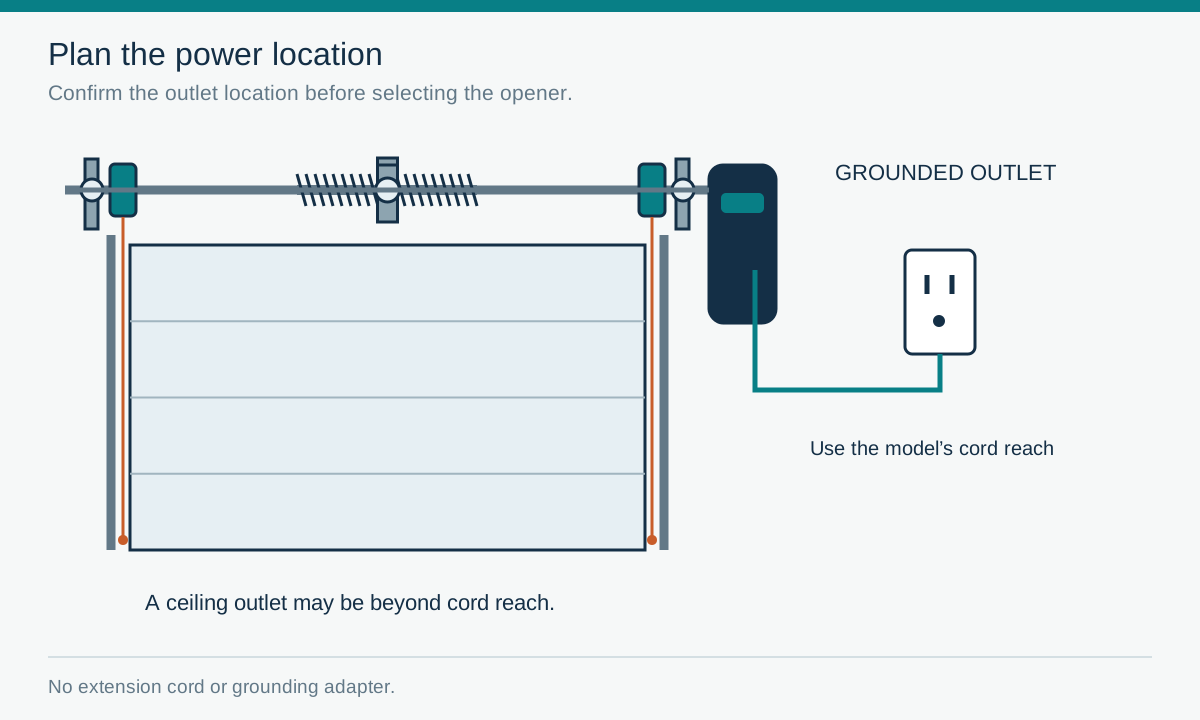
The 98022 planning page requires an outlet within 6 feet of the installation area; its electrical specification is 120 VAC, 60 Hz. The linked Genie manual requires a 115 VAC grounded outlet within 5 feet of the bottom of the operator. Notice that even the distance reference differs.
An existing ceiling outlet for a trolley opener may be too far away. Both manuals prohibit using an extension cord or defeating grounding. Have a qualified electrician provide a compliant outlet or permitted permanent wiring when needed. Do not cut a cord or open electrical covers as part of this survey. Genie lists a specific power-extension kit as an alternative in its manual; that is a model-approved system with its own instructions, not permission to use a household extension cord.
 Open full diagram
Step 5: include the lock, sensors and cable-control provisions
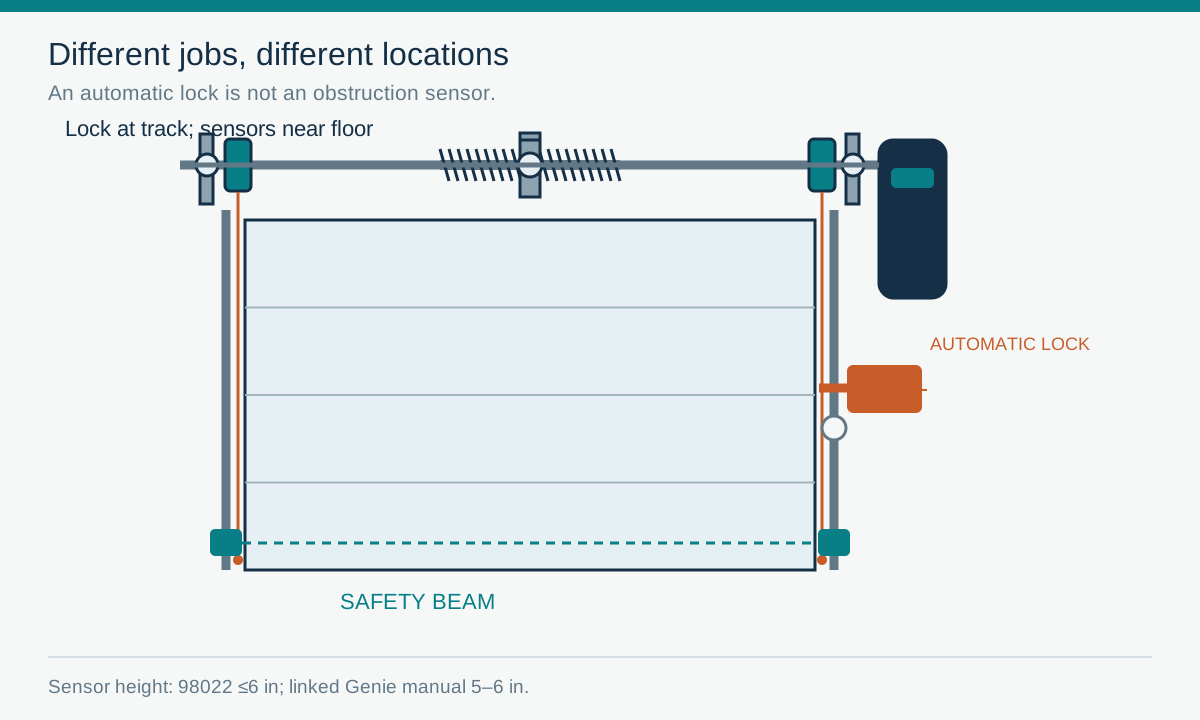
A quote that only names the motor is incomplete. Ask the installer to identify the automatic door lock, compatible photoelectric sensors, required lighting, release arrangement and all cable-control provisions for that exact opener.
- 98022: the manual includes the 841LM automatic door lock and warns that older 24-volt locks are incompatible. LiftMaster’s current product page explicitly says no cable-tension monitor is required. Do not import the separate monitor requirement from an older wall-mount model. The 98022 still requires its Protector System sensors, aligned no more than 6 inches above the floor, plus all specified setup and reversal tests. Its myQ remote LED light is required to enable Timer-to-Close or myQ smartphone door control.
- Genie linked manual: installation includes cable keepers, a door lock and compatible Safe-T-Beam sensors. Cable keepers are mechanical cable-management parts, not a substitute for photoelectric protection. The specified beam height is 5–6 inches above the floor. Do not substitute another maker’s photocells. Have a professional handle the keeper and lock work rather than disturbing loaded bottom hardware.
 Open full diagram
A manually latched slide lock and an operator-controlled automatic lock are not interchangeable. The installer must address existing manual locks as the manual directs. Never run the motor against a locked door, bypass sensors or omit required components to make a marginal installation operate.
Step 6: ask for a compatibility decision, not just an installation price
Send the installer the full inside-door photo, close-up photos of both shaft ends and readable labels, the outlet location, and notes about ceiling storage or other obstructions. Ask for a written answer covering:
- The exact opener model and applicable manual revision.
- The approved shaft, drum and track/lift combination.
- Verified clearances and structural mounting support on the chosen side.
- Electrical work and model-specific lock, sensor, light and cable-management parts.
- Any door repairs needed first, separated from the opener installation.
- Commissioning of travel, force, obstruction reversal, sensors, automatic lock and emergency release according to the manual.
A wall-mount opener is a strong candidate when a compatible, properly balanced sectional door already has the right torsion system and the side installation area meets every requirement. It is a poor shortcut when the real problem is a damaged door, incompatible drums or an unsuitable track layout. Freeing the center ceiling is a benefit; proving the entire system fits comes first.
Frequently asked questions
Will a wall-mount opener work with extension springs?
Not with the arrangements covered here. These manuals require a compatible torsion-shaft system. Have a technician assess the door rather than attempting a spring conversion.
Does a wall-mount opener solve every low-headroom problem?
No. It removes the central trolley rail, but the door and tracks still need clearance. The covered manuals exclude low-headroom outside-pickup or reverse-wound drum arrangements.
Does every jackshaft opener need a cable-tension monitor?
No. LiftMaster states that the 98022 needs no separate cable-tension monitor. The linked Genie manual includes cable keepers. Follow the exact model’s complete requirements instead of copying another model.
Can I keep the outlet used by my old ceiling opener?
Only if its location, grounding and supply meet the new model’s requirements without an extension cord. The 98022 and the linked Genie manual specify different distances and reference points.
LiftMaster 98022 owner’s manual: planning, installation, door profiles and safety systems.
LiftMaster 98022 product page: model-specific cable-monitor statement and manual links.
Genie Wall Mount Pro manual, linked by Genie Wall Mounted Series support, including 6170H.
Related Posts
 Planning Guide
What Size Garage Door Opener Do You Need?
Choose an opener by verified door compatibility, height, construction, balance, site clearance, and usage—not a horsepower shortcut.
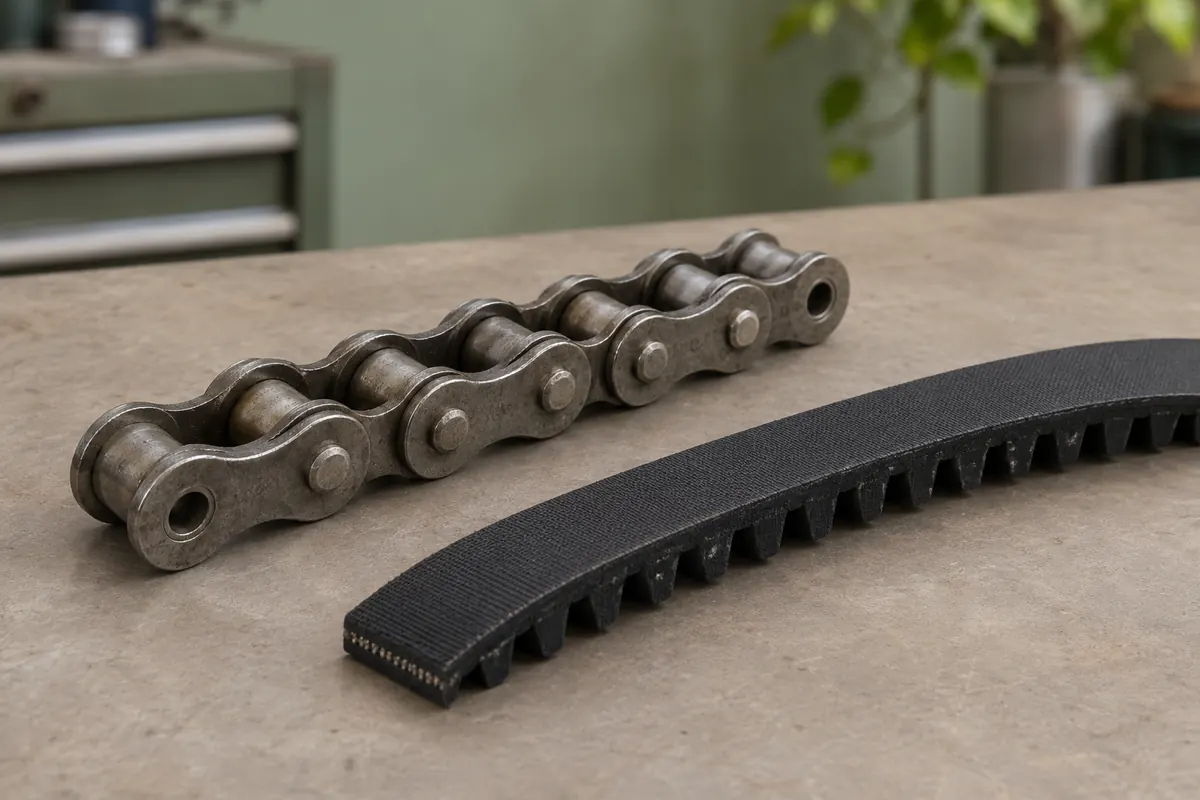
Chain vs. Belt Garage Door Openers: Compare the Whole System
Compare chain and belt drives by noise, door compatibility, maintenance and installed scope. Choose a model without assuming drive type alone determines capacity.
 Practical Guide
Garage Doors With Low Headroom: System Options and Constraints
Compare low-headroom track layouts, front and rear torsion, opener limitations and space conflicts before choosing a complete garage-door system.
 Practical Guide
Electrical Requirements for a Garage Door Opener
Check 120 V input, grounding, outlet placement, circuit capacity and GFCI protection before installing a garage door opener. Know when to call an electrician.
Sources
Manufacturer instructions and references for this guide. Match the document to your exact product.
- LiftMaster 98022 owner’s manualcgi.widen.net
- LiftMaster 98022 product pagewww.liftmaster.com
- Genie Wall Mount Pro manualwww.geniecompany.com
- Genie Wall Mounted Series supportsupport.geniecompany.com